Moving involves a lot of planning and organization. Packing food can be particularly tricky. Here’s a guide on how to pack your food when moving, including some unique tips you might not find elsewhere.

1. Plan Ahead

Inventory Your Food

Start by taking an inventory of all the food you have. This helps you decide what to keep, consume, or discard before the move.

Meal Planning

Plan meals leading up to the move to use up perishable items. This reduces the amount of food you need to pack and ensures nothing goes to waste.

Gather Packing Supplies

Get sturdy boxes, coolers, ice packs, bubble wrap, and packing tape. These items will help you pack your food safely and efficiently.

2. Sort and Declutter

Non-Perishable Items

Sort non-perishable items like canned goods, pasta, and spices. Pack these items first since they are less likely to spoil.

Perishable Items

Decide what perishable items you can consume before moving. Donate or discard items you can’t consume in time.

Unopened Items

Consider donating unopened items to a local food bank. This is a great way to reduce waste and help those in need.

3. Packing Non-Perishables

Use Sturdy Boxes

Pack non-perishable items in sturdy boxes. Ensure the boxes are not too heavy to lift. Reinforce the bottoms with packing tape for added support.

Group Similar Items

Group similar items together. Pack canned goods with other canned goods and spices with spices. This makes unpacking easier.

Cushion Fragile Items

Use bubble wrap or packing paper to cushion fragile items like glass bottles or jars. This prevents them from breaking during the move.

4. Packing Perishables

Use Coolers and Ice Packs

Pack perishables in coolers with ice packs to keep them cold during the move. This is essential for items like dairy products, meat, and frozen goods.

Keep the Cooler Accessible

Place the cooler in an easily accessible location. This allows you to add more ice if needed and keeps your perishables at a safe temperature.

Dry Ice Option

Consider using dry ice for long-distance moves. Dry ice keeps items frozen for longer periods. Handle it with care and follow safety instructions.

5. Special Tips for Unique Items

Herbs and Spices

Store herbs and spices in airtight containers. Label each container clearly. This keeps them fresh and makes unpacking easier.

Baking Supplies

Use sealed containers to prevent spills for baking supplies like flour, sugar, and baking soda. Place them in a sturdy box with cushioning.

Wine and Alcohol

Pack wine and alcohol bottles upright in wine boxes with dividers. This prevents them from breaking and keeps them secure during the move.

6. Label Everything Clearly

Detailed Labels

Label each box with its contents and the room it belongs to. Include handling instructions like “Fragile” or “Keep Upright” to help movers handle the boxes with care.

Inventory List

Create an inventory list of all packed food items. This helps you keep track of everything and makes unpacking easier.

7. Hire Professional Movers & Packers

Specialized Movers

Consider hiring professional movers, especially for large moves. One Day Movers, one of the leading moving companies in Toronto, specializes in handling and transporting your items safely.

Check Reviews and Insurance

Check reviews and ensure the moving company offers insurance coverage for your items. This provides peace of mind in case of any damage during the move.

8. Unique Tips for Packing Food

1. Use Vacuum Seal Bags

Vacuum seal bags are great for storing and transporting food. They remove air, keeping food fresh for longer periods.

2. Create a Moving Day Snack Box

Pack a separate box with snacks and easy-to-eat items for moving day. This keeps you fueled and prevents unnecessary stops for food.

3. Freeze Liquids

Freeze liquids like soups and sauces before packing. This reduces the risk of spills and keeps them fresh longer.

4. Insulate with Towels

Use towels to insulate your cooler and keep items cold longer. This is especially helpful if you’re moving during hot weather.

9. Consider Temporary Storage

Short-Term Storage Solutions

If you’re moving long-distance or need time before settling into your new home, consider using short-term storage solutions. Many moving companies in Toronto offer storage services.

Climate-Controlled Storage

For sensitive food items, choose climate-controlled storage units. These units maintain a consistent temperature and humidity level, protecting your food from extreme conditions.

10. Unpacking and Setting Up

Organize as You Unpack

When you arrive at your new home, organize your pantry and refrigerator as you unpack. This helps you settle in quickly and efficiently.

Check Expiration Dates

Check the expiration dates of all items as you unpack. Discard any items that may have spoiled during the move.

Restock Essentials

Make a list of essential items you need to restock. This helps you get back to your normal routine faster.

Final Thoughts

Packing food for a move requires careful planning and the right materials. By following these steps and unique tips, you can ensure your food is packed safely and efficiently. If you need help, consider hiring One Day Movers, one of the leading moving companies in Toronto. They provide reliable and professional moving services, ensuring your move is stress-free. Contact One Day Movers today for a free quote and experience top-notch service from one of the best Toronto movers.

FAQs

1. What is the best way to pack non-perishable food items?

Use sturdy boxes and group similar items together. Cushion fragile items with bubble wrap or packing paper.

2. How do I keep perishable items cold during the move?

Use coolers with ice packs or dry ice for long-distance moves. Keep the cooler in an easily accessible location.

3. Should I hire professional movers for packing food?

Yes, especially for large moves. One Day Movers, one of the best Toronto movers, offers specialized services for moving your items safely.

4. How can I ensure my food items are protected during the move?

Use high-quality packing materials, wrap each item securely, and fill any empty spaces in the boxes. Label everything clearly and consider hiring professional movers.

5. What should I do with food items I no longer need?

Consider donating unopened items to a local food bank. This reduces waste and helps those in need.

Moving can be stressful, especially when it comes to packing your kitchen appliances. These items are often bulky, fragile, and expensive, requiring extra care during the moving process. Here are some detailed steps and unique tips to help you pack your kitchen appliances safely and efficiently.

1. Gather Packing Supplies

Essential Supplies

Start by gathering all necessary packing supplies. You’ll need sturdy boxes, bubble wrap, packing paper, packing tape, and markers for labeling. Make sure the boxes are strong enough to support the weight of your appliances.

Specialized Packing Materials

Consider investing in specialized packing materials like foam corner protectors and appliance covers. These can provide extra protection for your appliances during the move.

Eco-Friendly Options

For a more eco-friendly move, use biodegradable packing peanuts and recycled boxes. You can also wrap items in old towels or blankets instead of buying bubble wrap.

2. Clean and Prepare Appliances

Unplug and Disassemble

Unplug all appliances at least 24 hours before packing to allow them to cool down and defrost if necessary. Disassemble any removable parts, such as trays, racks, and blades. This makes packing easier and prevents parts from getting lost or damaged.

Clean Thoroughly

Clean each appliance thoroughly to remove any food residues or dirt. This prevents mold and unpleasant odors from developing during the move. For stubborn stains, use a mixture of baking soda and water.

Dry Completely

Ensure all appliances are completely dry before packing. Moisture can cause mold and mildew, which can damage your appliances.

3. Packing Small Appliances

Use Original Boxes

If you have the original boxes for your appliances, use them. They are designed to fit the appliance perfectly and provide the best protection.

Wrap in Bubble Wrap

For small appliances like toasters, blenders, and coffee makers, wrap each item in bubble wrap. Secure the bubble wrap with packing tape to ensure it stays in place.

Fill Empty Spaces

Place the wrapped appliance in a sturdy box and fill any empty spaces with packing peanuts or crumpled packing paper. This prevents the appliance from shifting during the move.

4. Packing Large Appliances

Fridge and Freezer

Defrost your fridge and freezer at least 24 hours before moving. Remove all shelves and drawers and wrap them separately in bubble wrap. Secure the doors with bungee cords or moving straps. Use a dolly to move the appliance safely.

Oven and Stove

Clean your oven and stove thoroughly. Remove and pack all detachable parts separately. If your stove has a gas connection, hire a professional to disconnect and reconnect it.

Dishwasher

Empty and clean your dishwasher. Remove the racks and secure the door with tape. Wrap the appliance in moving blankets to protect it from scratches.

5. Label Everything Clearly

Detailed Labels

Label each box with the contents and the room it belongs to. Include handling instructions like “Fragile” or “This Side Up” to help movers handle the boxes with care.

Inventory List

Create an inventory list of all packed appliances. This helps you keep track of everything and makes unpacking easier.

6. Hire Professional Packers & Movers

Specialized Movers

Consider hiring professional movers, especially for large appliances. One Day Movers, one of the leading moving companies in Toronto, specializes in handling and transporting kitchen appliances safely.

Check Reviews and Insurance

Check reviews and ensure the moving company offers insurance coverage for your appliances. This provides peace of mind in case of any damage during the move.

7. Unique Tips for Moving Kitchen Appliances

1. Use Plastic Wrap for Extra Security

Wrap cords and hoses with plastic wrap to keep them secure. This prevents them from dangling and getting damaged.

2. Photograph Appliance Setups

Take photos of your appliance setups, including how cords and hoses are connected. This makes reassembly in your new home much easier.

3. Use Foam Pouches for Blades

Place sharp blades from mixers or food processors in foam pouches. This protects the blades and prevents injury when unpacking.

4. Pack Heaviest Items at the Bottom

When packing boxes with multiple items, place the heaviest items at the bottom. This keeps the box stable and prevents lighter items from getting crushed.

8. Consider Temporary Storage

Short-Term Storage Solutions

If you’re moving long-distance or need time before settling into your new home, consider using short-term storage solutions. Many moving companies in Toronto offer storage services.

Climate-Controlled Storage

For sensitive appliances, choose climate-controlled storage units. These units maintain a consistent temperature and humidity level, protecting your appliances from extreme conditions.

9. Reassembling and Setting Up

Follow Manufacturer Instructions

When reassembling your appliances, follow the manufacturer’s instructions. This ensures they are set up correctly and safely.

Test Appliances

Once your appliances are set up, test them to ensure they are working properly. If any issues arise, refer to the user manual or contact the manufacturer for support.

10. Eco-Friendly Disposal of Unwanted Appliances

Donate or Recycle

If you have appliances you no longer need, consider donating them to a local charity or recycling them. Many organizations accept gently used appliances and will even pick them up from your home.

E-Waste Programs

Check if your local area has e-waste disposal programs. These programs specialize in recycling electronic waste, ensuring that appliances are disposed of responsibly.

Final Thoughts

Packing kitchen appliances for moving requires careful planning and the right materials. By following these steps and unique tips, you can ensure your appliances are packed safely and efficiently. If you need help, consider hiring One Day Movers, one of the leading moving companies in Toronto. They provide reliable and professional moving services, ensuring your move is stress-free. Contact One Day Movers today for a free quote and experience top-notch service from one of the best Toronto movers.

FAQs

1. What is the best way to pack small kitchen appliances?

Use the original boxes if available. Wrap each appliance in bubble wrap and fill any empty spaces in the box with packing peanuts or crumpled packing paper to prevent shifting.

2. How do I prepare my fridge for moving?

Defrost your fridge 24 hours before moving. Clean and dry it thoroughly, remove all shelves and drawers, and secure the doors with bungee cords or moving straps.

3. Should I hire professional movers for kitchen appliances?

Yes, especially for large or heavy appliances. One Day Movers, one of the best Toronto movers, offers specialized services for moving kitchen appliances safely.

4. How can I ensure my appliances are protected during the move?

Use high-quality packing materials, wrap each appliance securely, and fill any empty spaces in the boxes. Label everything clearly and consider hiring professional movers.

5. What should I do with unwanted appliances?

Donate them to a local charity or recycle them. Many organizations accept gently used appliances and may offer pick-up services.


Moving to a new home can be overwhelming, but with the right organization and labeling strategies, you can simplify the unpacking process. This guide delves into effective techniques that ensure you’re ready to settle into your new place with ease.

  • Start with a Plan: Create an inventory to track your items.
  • Declutter and Donate: Get rid of items you no longer need before moving.
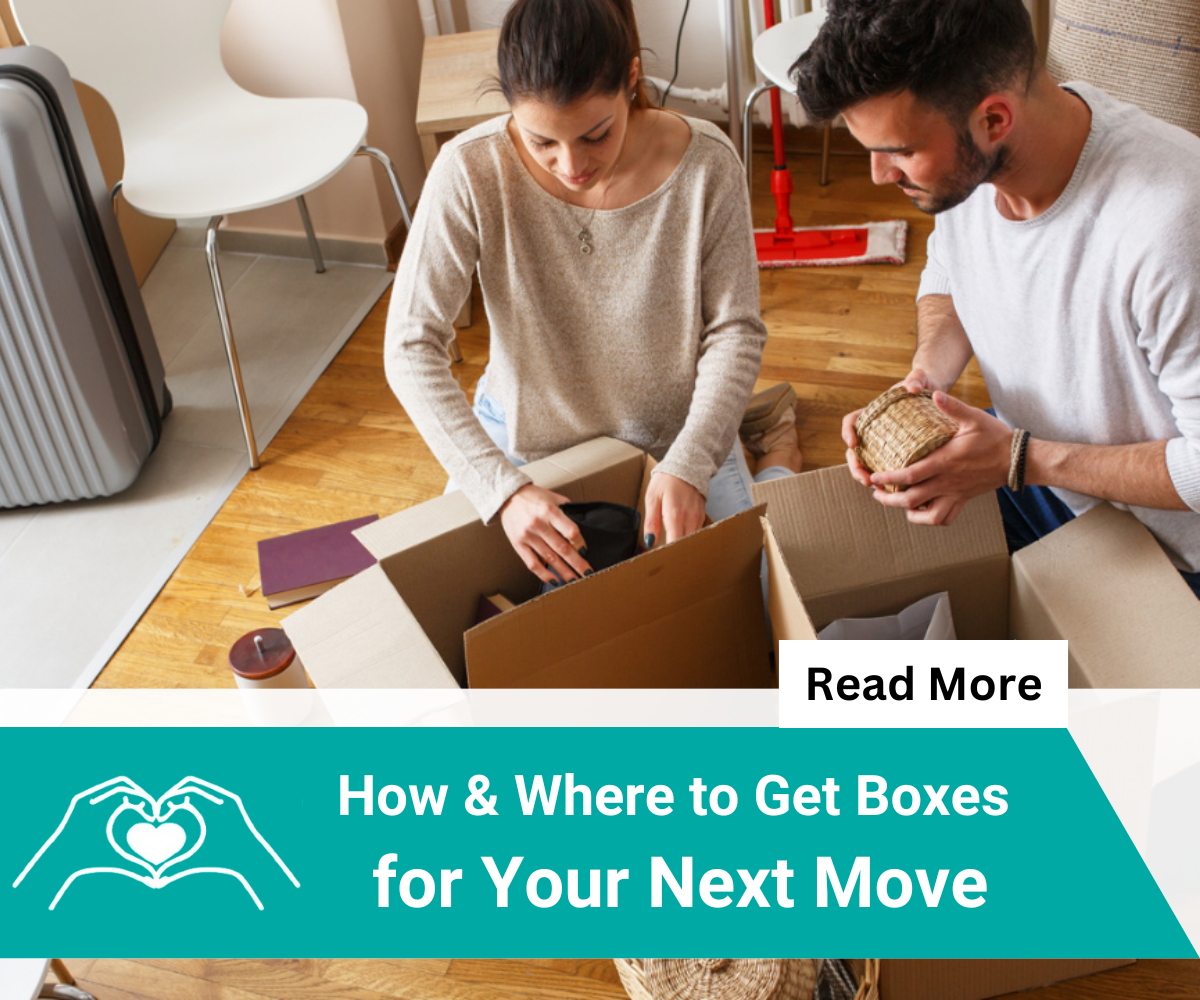
  • Select the Right Supplies: Invest in sturdy boxes, tape, and bubble wrap.
  • Innovative Labeling Techniques: Use color-coded stickers and icons for easy identification.
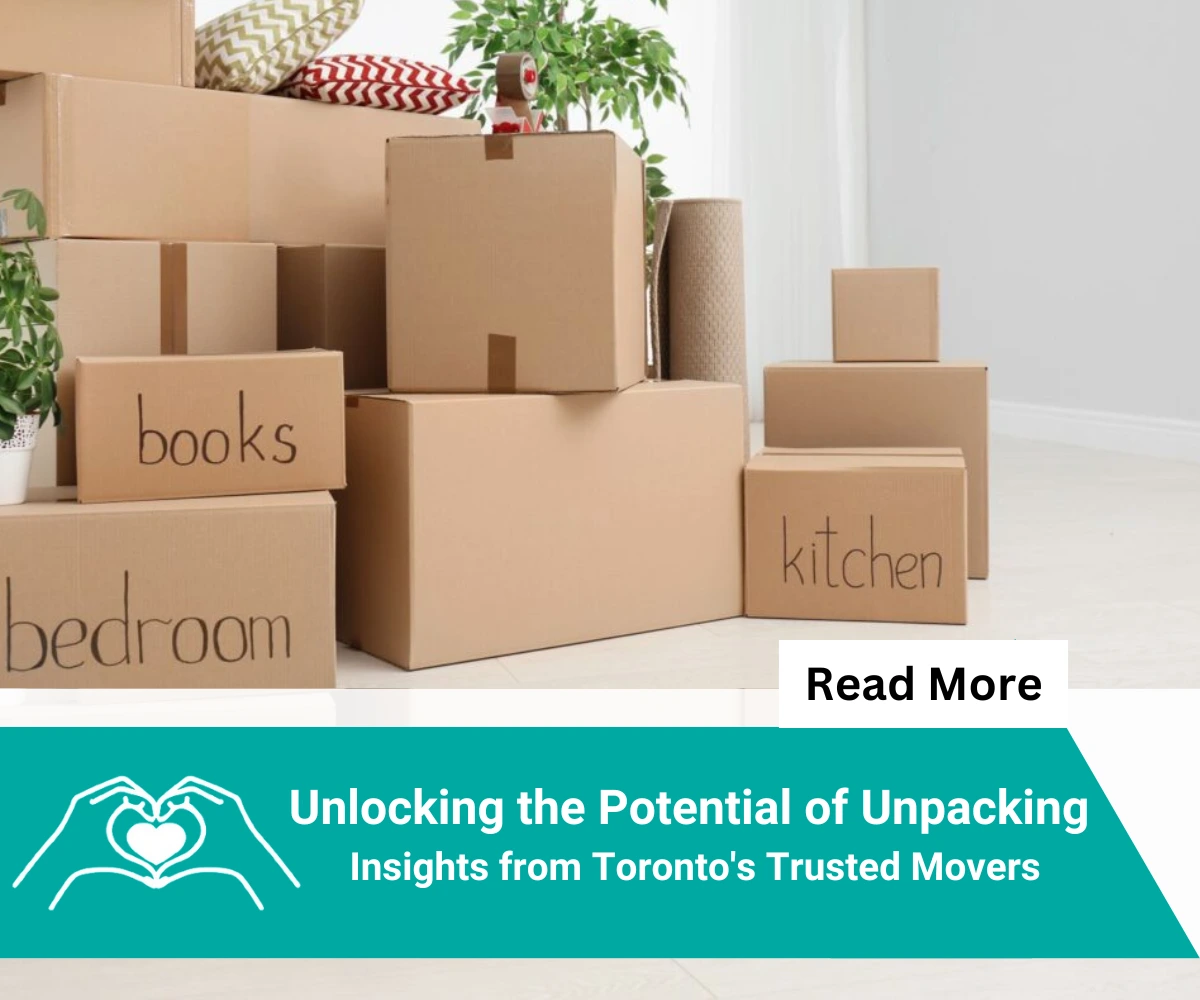
  • Detailed Box Descriptions: Clearly label contents for easier unpacking.
  • Prioritize with “Load Last, Unload First”: Keep essential items accessible.
  • Protect Fragile Items: Use labels and cushioning materials to safeguard delicate items.
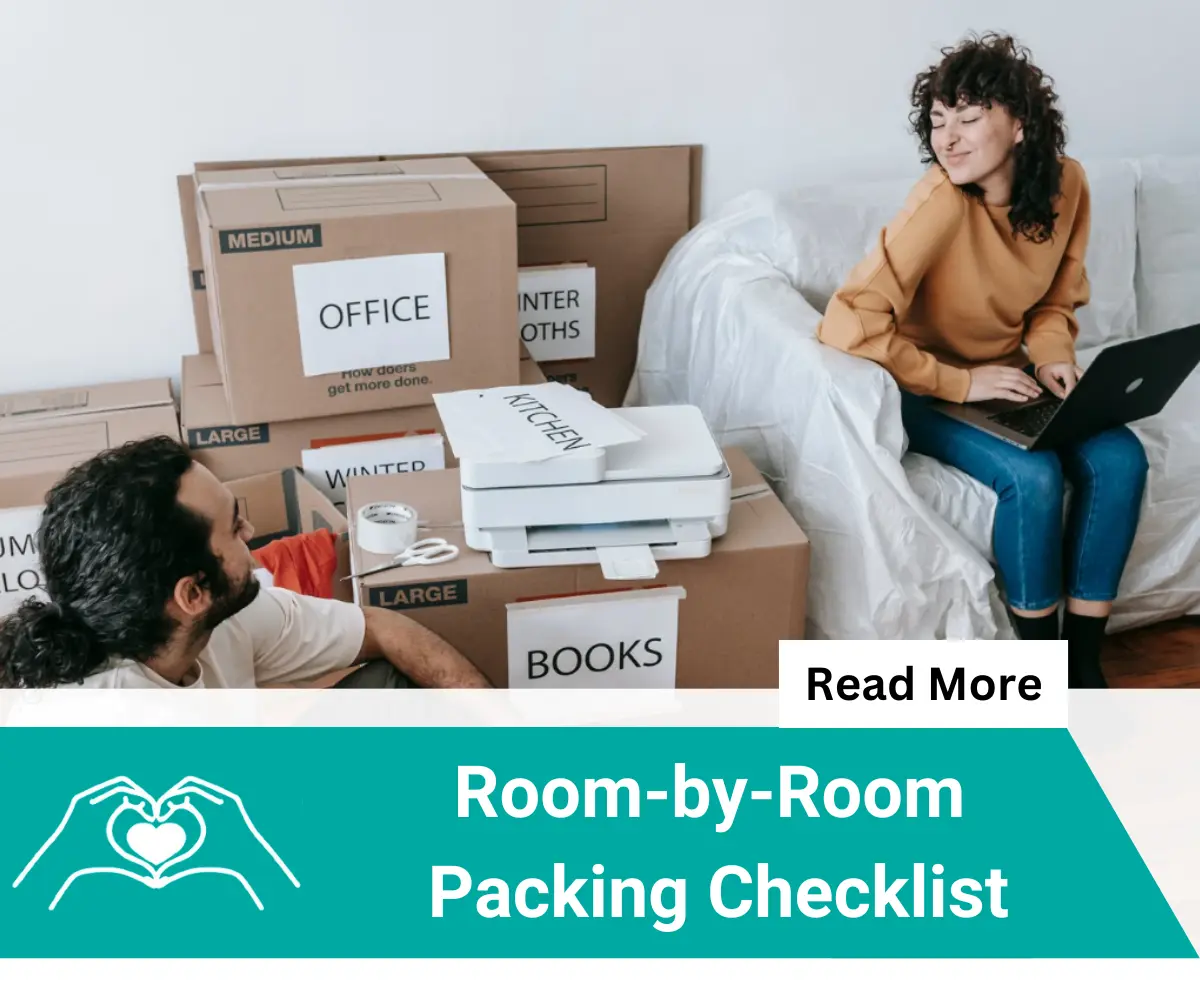
  • Room-by-Room Unpacking: Unpack methodically, starting with essential rooms.
  • Special Considerations for Specialty Items: Label with detailed handling instructions.
  • Leverage Technology: Use QR codes linked to box inventories.
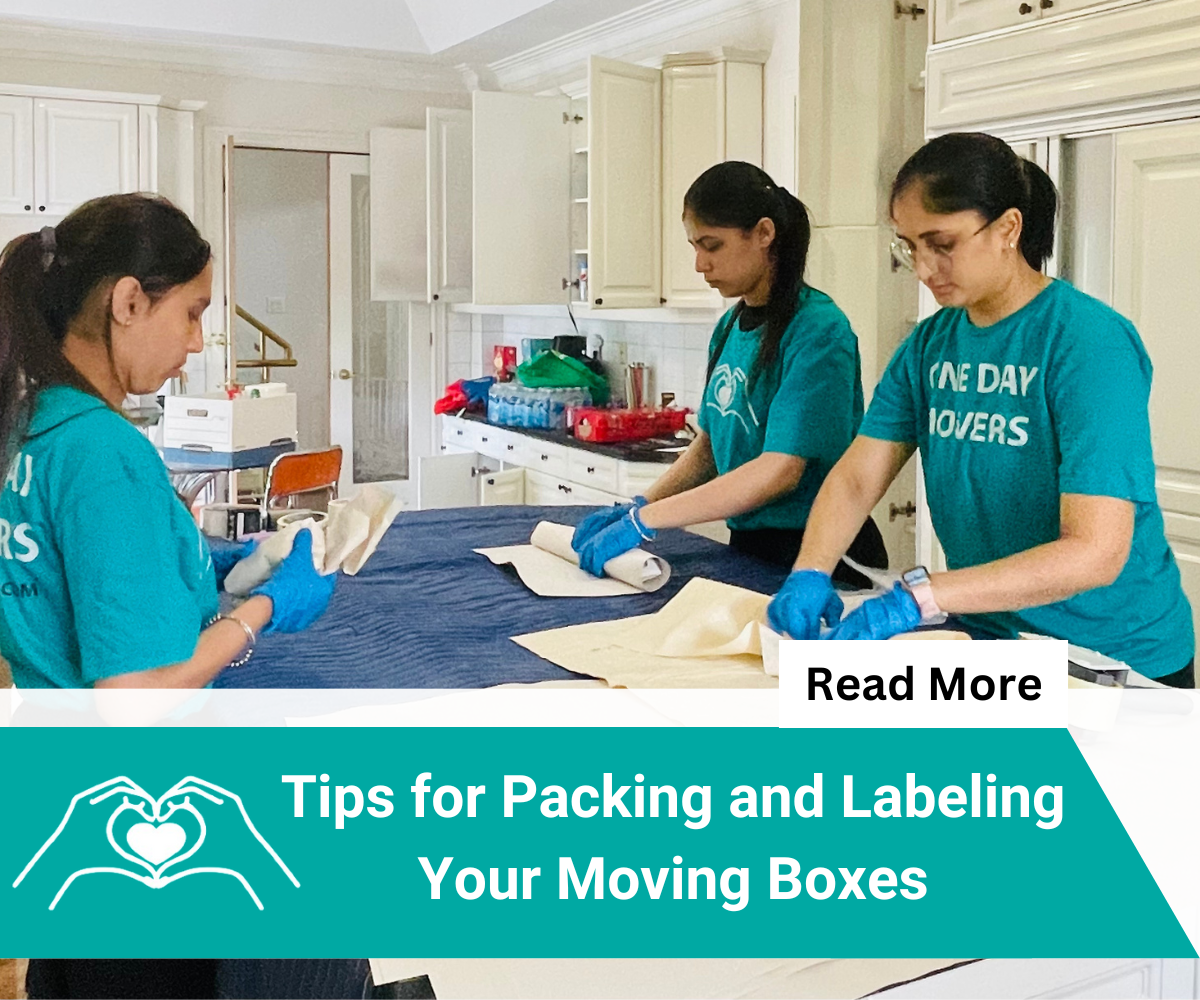
  • Engage Professional Help: Consider professional movers to ease the process.
  • Maintain an Inventory List: Keep an updated list for insurance and organization.

12 Essential Tips for Packing and Labeling Your Moving Boxes

1. Start with a Plan

Start with a Plan Before you seal your first box, create a detailed inventory of your belongings. This might seem tedious but will save headaches later. Keep this inventory accessible and easy to update, perhaps using a digital tool or app recommended by your moving company in Toronto.

Remember, starting with a plan is the most important part of this packaging and labelling guide that we are sharing with you.

2. Declutter and Donate

Take this opportunity to declutter your home. Donate or sell items you no longer need to reduce the volume of belongings. A good packaging and labelling guide often emphasizes the importance of reducing clutter to make packing easier and faster.

3. Select the Right Supplies

Invest in quality moving supplies. This includes sturdy boxes, strong packing tape, bubble wrap, and permanent markers. For delicate or valuable items, consider custom crating solutions to prevent damage.

4. Innovative Labeling Techniques

Get creative with your labeling. Use color-coded stickers for each room—this makes it easy for movers in Toronto to quickly place boxes in the correct spaces. Also, use symbols or icons for specific categories like books, electronics, or kitchenware.

5. Detailed Box Descriptions

Provide detailed descriptions of each box’s contents. For instance, label a kitchen box with “spices, cooking utensils, dish towels.” This precision helps prioritize which boxes to unpack first, a tip often suggested by packing companies in Toronto for organized relocation.

6. Prioritize with a “Load Last, Unload First” Approach

When planning your move, it’s crucial to think about the order in which you’ll need your belongings. Designate essential boxes as ‘Load Last, Unload First.’ These boxes should include items you’ll need immediately upon arrival at your new home, such as bedding for a good night’s sleep, dishes for your first meal, and basic toiletries for freshening up after a long day of moving. 

Label these boxes clearly and provide specific instructions to your movers to ensure they load these last on the truck and unload them first. This strategy not only simplifies your first night in your new home but also helps reduce the stress of searching through multiple boxes for essential items. And this has also been suggested by most movers in Toronto. Consider using brightly colored labels or tags to make these boxes stand out even more, ensuring they are not overlooked during the moving process.

Following this advice, commonly found in a packaging and labelling guide can streamline your unpacking process.

7. Protect Your Fragile Items

Fragile items require special attention during moves to prevent damage. Use clear labeling for boxes containing fragile items. Label these boxes prominently with the word “Fragile” and include directional arrows to indicate the box needs to remain upright. Employing symbols like a broken glass or an upside-down triangle can also draw attention to the need for careful handling. 

Inside each box, use plenty of cushioning materials such as bubble wrap, packing peanuts, or even crumpled paper to ensure that items do not shift during transport. For extremely delicate items, consider double-boxing by placing one box within another for added protection. It’s also a good practice to place these boxes in parts of the moving vehicle that are less susceptible to bumps and shocks. By taking these precautions, you help ensure that your fragile items arrive in the same condition as they left.

8. Room-by-Room Unpacking

Unpack one room at a time, starting with essential spaces like the kitchen or bathroom. This prevents clutter and allows you to settle in quicker. A structured packaging and labelling guide always encourages room-specific unpacking for better organization.

9. Special Considerations for Specialty Items

Label specialty items like artwork or electronics with handling instructions. This is crucial for movers, especially in a large city like Toronto where handling can vary significantly between locations.

10. Leverage Technology

Use QR codes on each box for a modern twist on labeling. Link each code to a detailed list of the box’s contents, accessible through your phone. This tech-savvy method simplifies tracking and finding items.

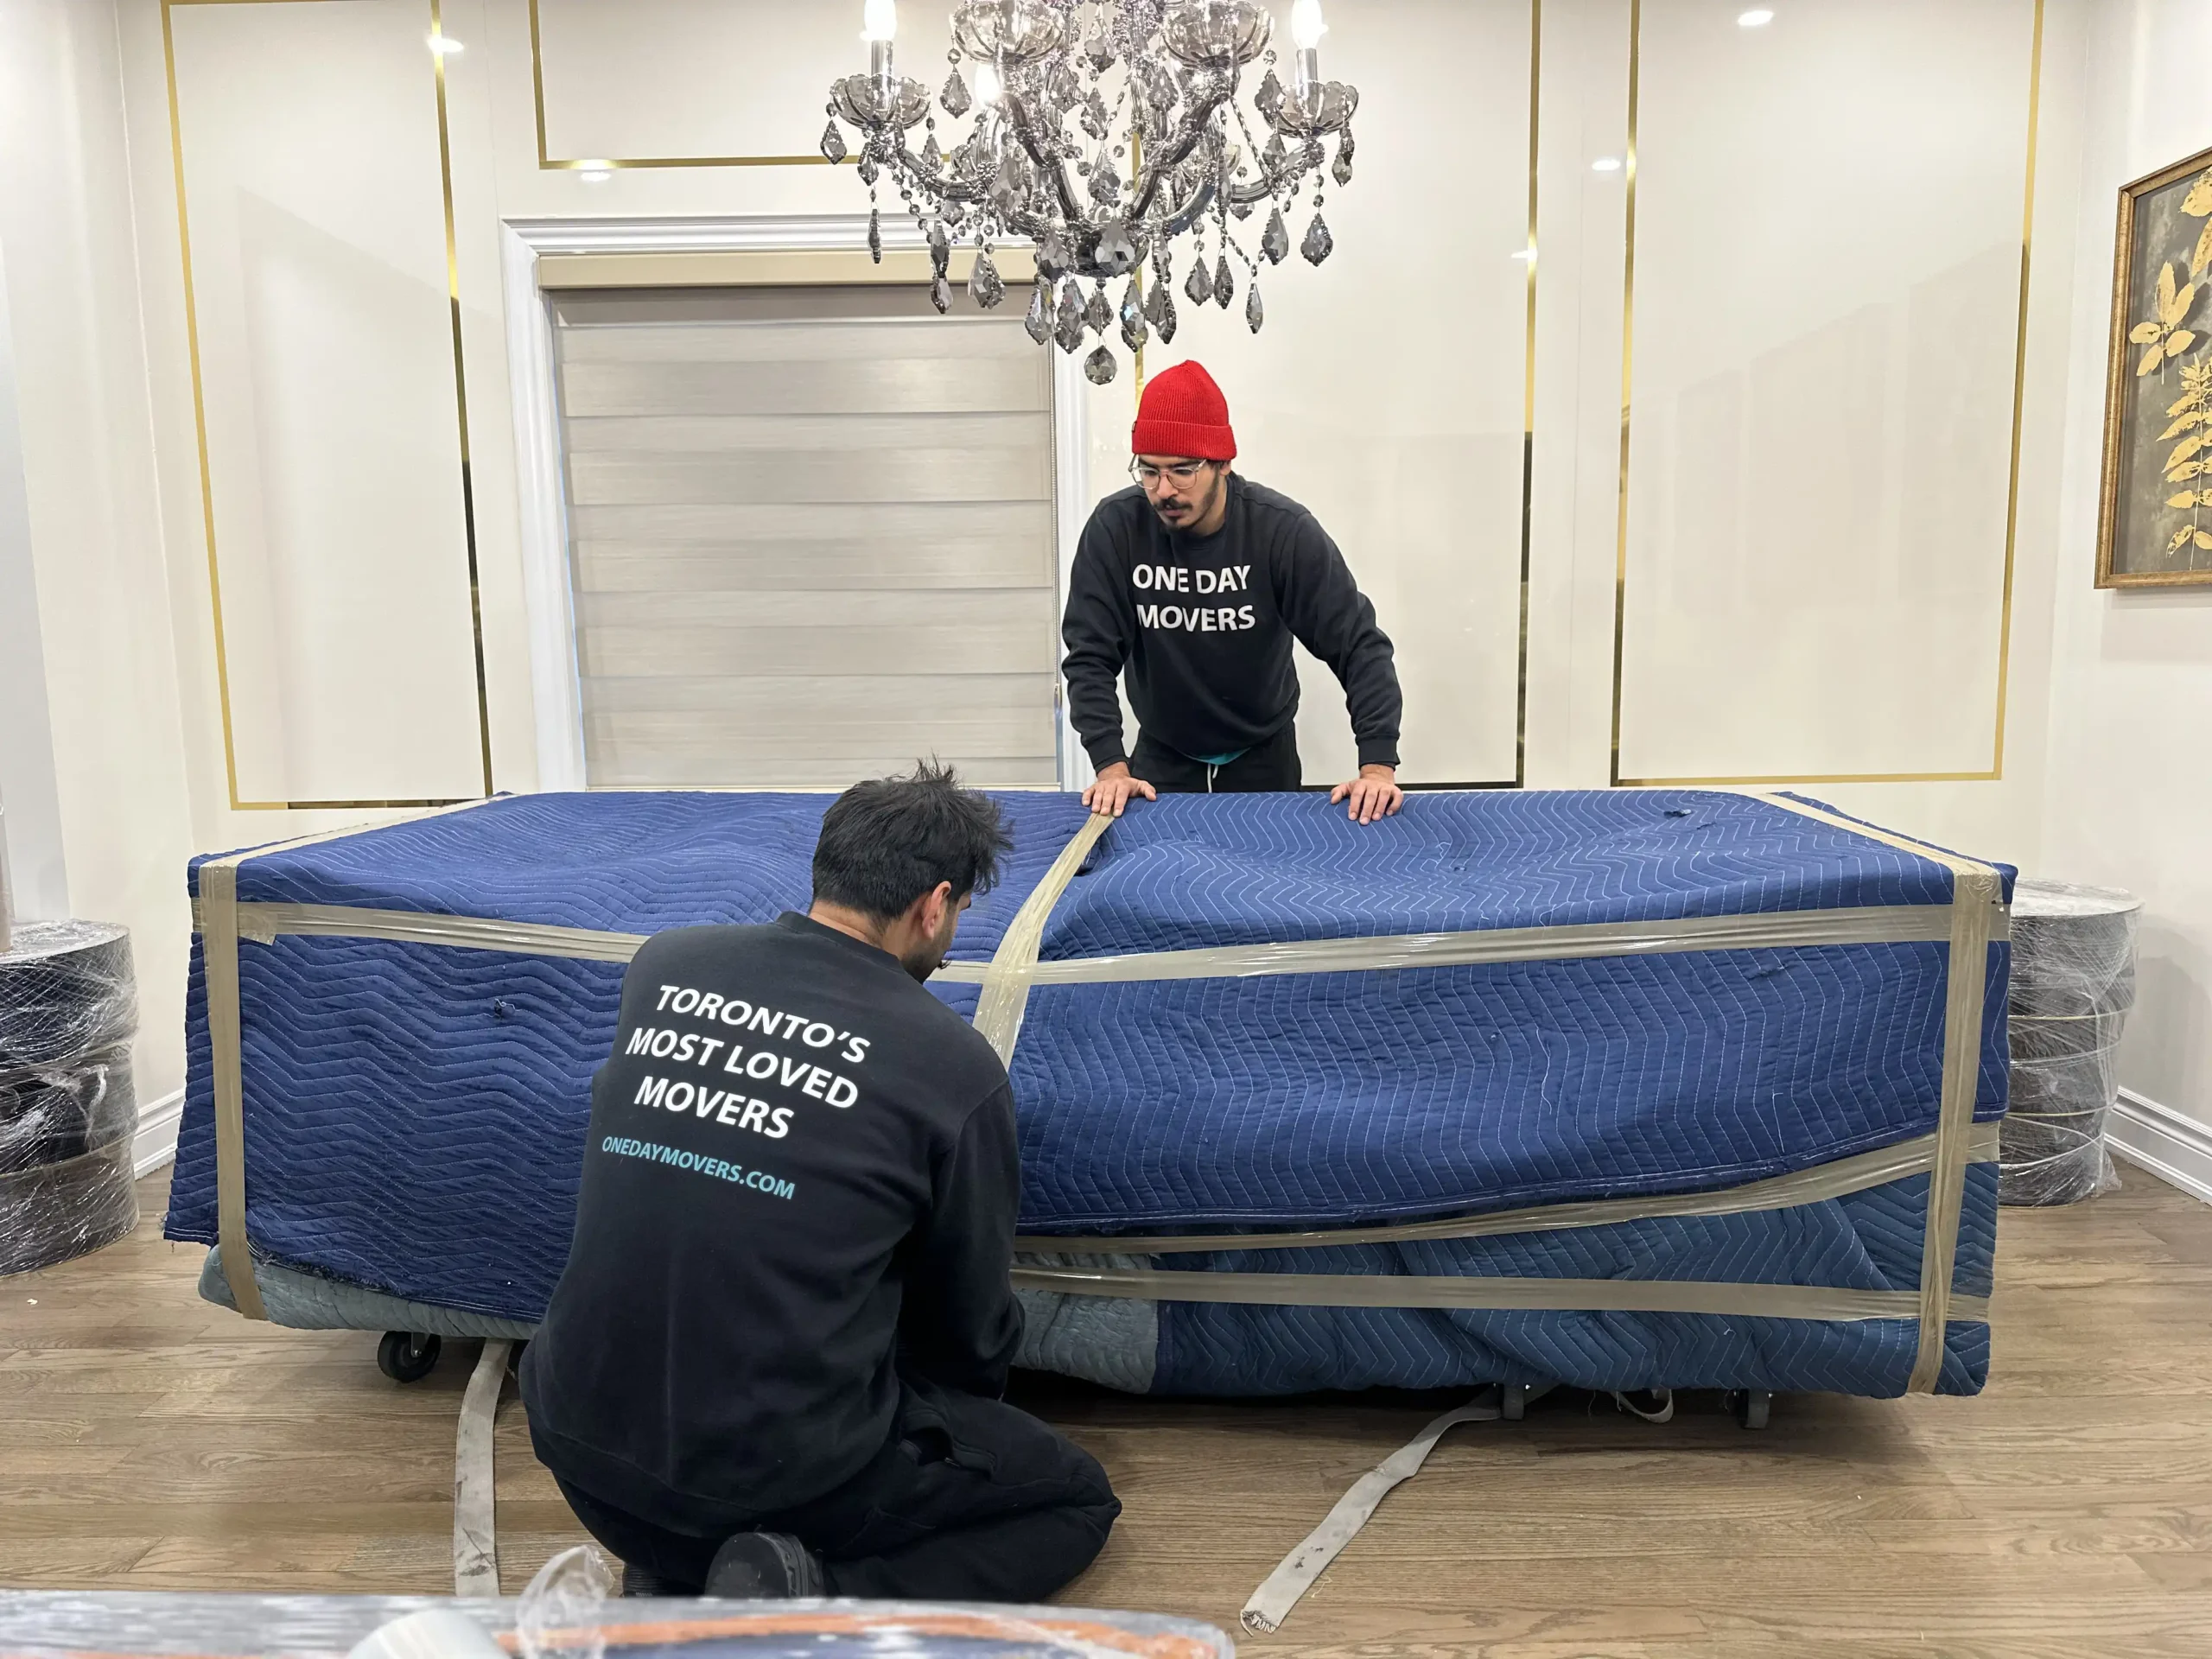
11. Engage Professional Help

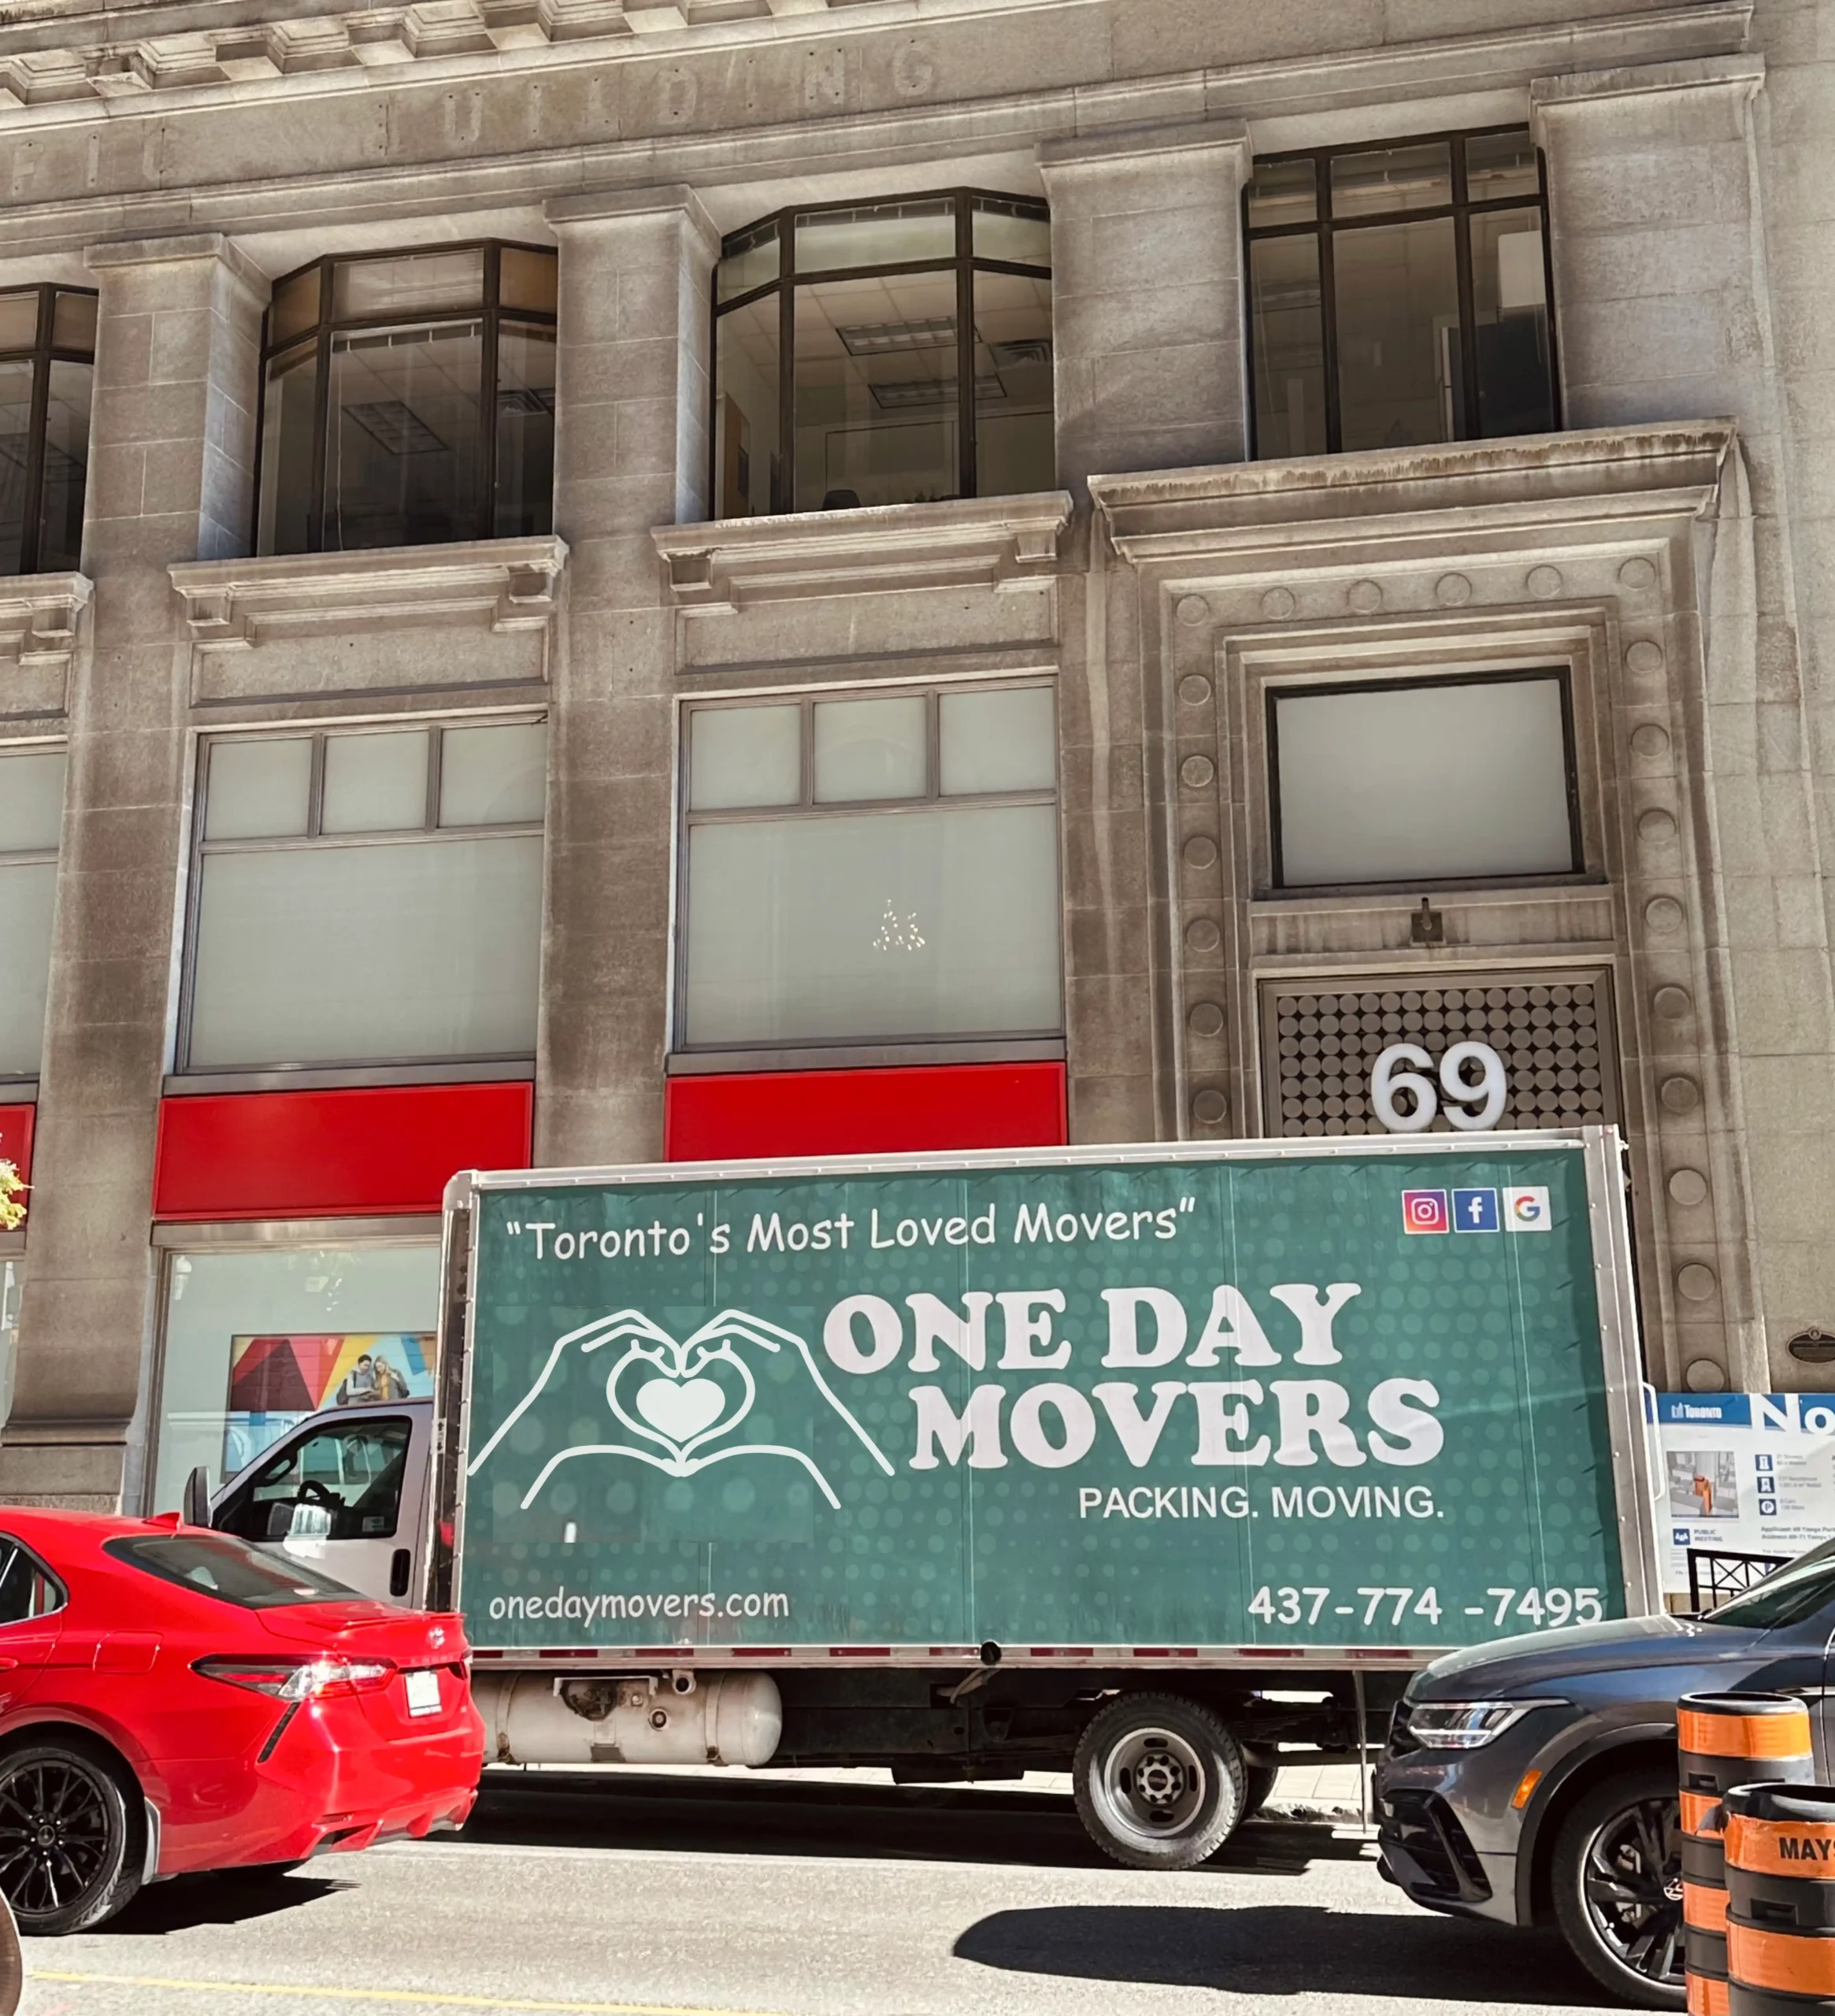
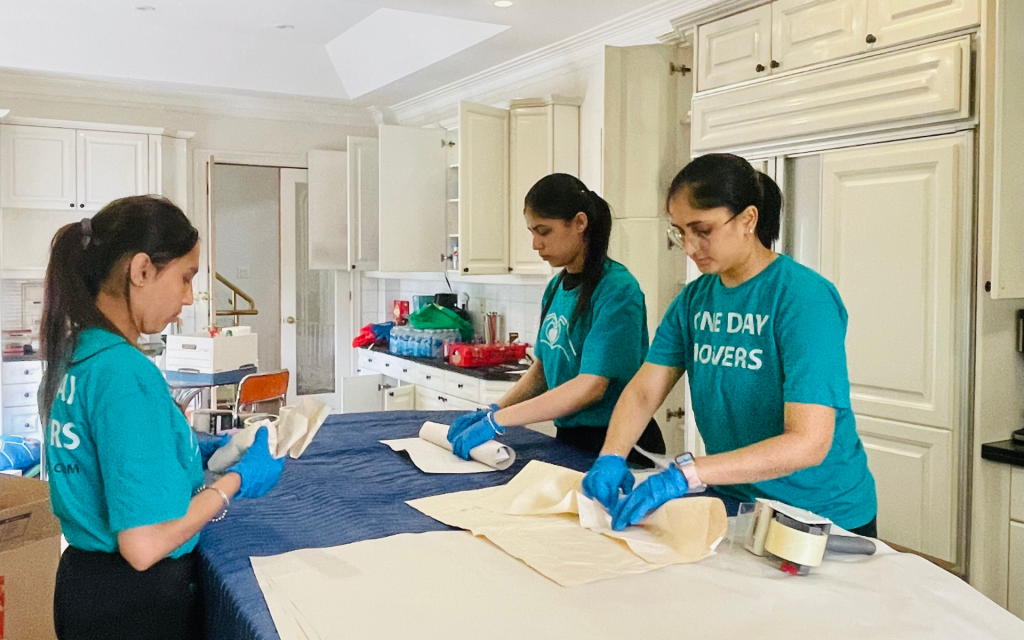
Consider hiring professional unpacking services. For those moving within Toronto, services like One Day Movers offer efficient unpacking solutions that can drastically reduce the stress of settling in.

12. Maintain an Inventory List

Keep an updated list of all packed items. This list is crucial for insurance purposes and to ensure you know exactly what was packed, making unpacking systematic and straightforward.

Bonus: Packing Tips for Specific Items
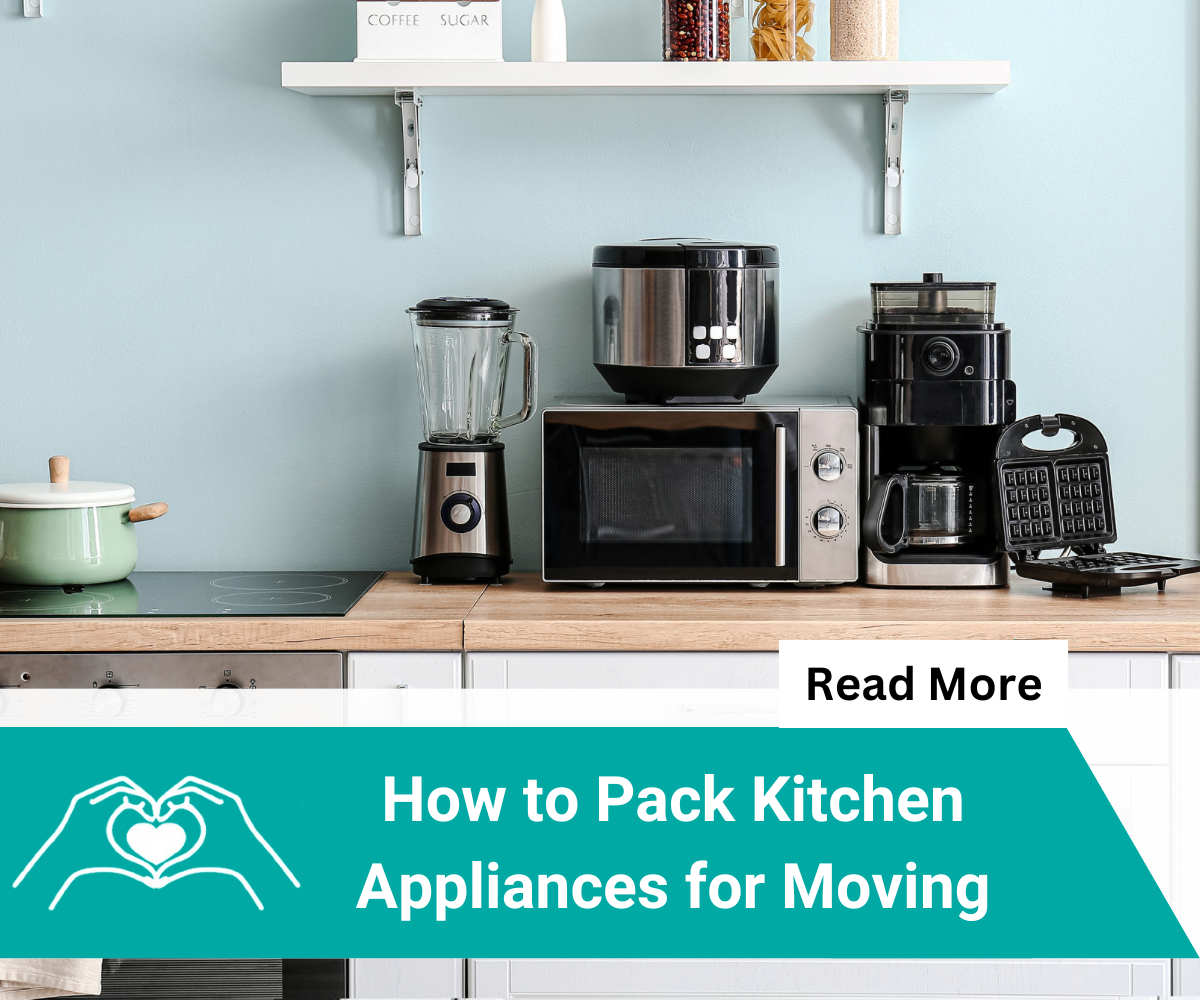
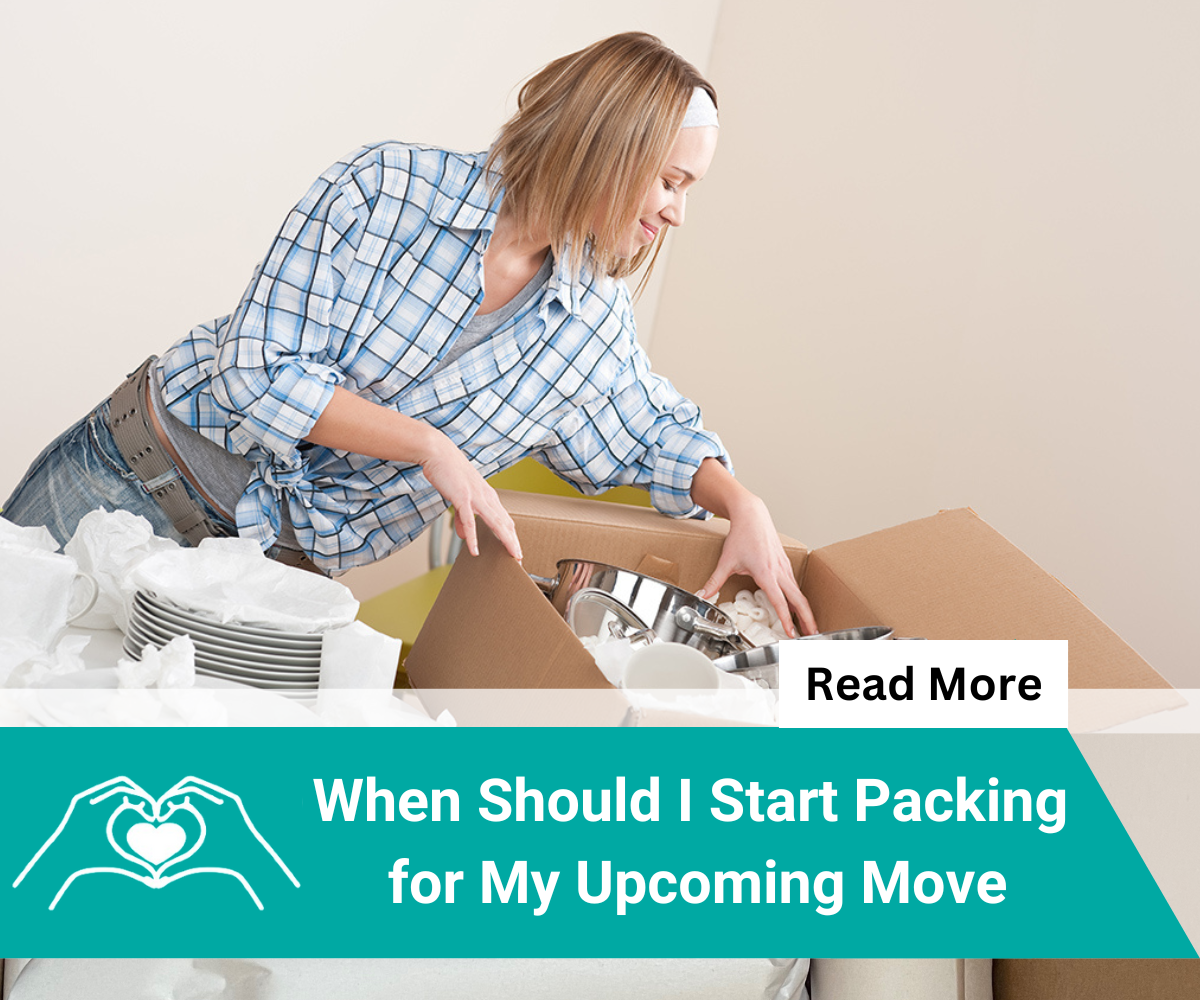
Kitchen Items

When packing kitchen items, use bubble wrap or packing paper to protect fragile items. Label these boxes as “Fragile” and indicate which room they go to. Also, mark them with a priority number 1 if you need to use them soon after moving.

Electronics

Pack electronics in their original boxes if possible. If not, use sturdy boxes and plenty of padding. Label these boxes clearly and add a QR code for a detailed inventory. Many Toronto movers recommend this for safe transport.

Clothing

Use wardrobe boxes for clothes on hangers. For folded clothes, use large suitcases or vacuum-sealed bags to save space. Label these with their respective rooms and usage categories.

Sustainable Packing and Labeling Solutions

As more people become conscious of their environmental impact, it’s important to consider sustainable options for packing and labeling during your move. Here’s how you can make your move eco-friendly while still staying organized:

  • Eco-Friendly Packing Materials: Opt for biodegradable packing peanuts, reusable containers, and recycled cardboard boxes. These options are better for the environment compared to traditional packing materials.
  • Reusable Labels: Instead of using single-use stickers or tape for labeling, consider using reusable labels or tags. You can use erasable markers or chalkboard labels that can be used again in future moves.
  • Donate or Recycle Unused Materials: After unpacking, donate or recycle your packing materials to ensure they don’t end up in a landfill. Many moving companies in Toronto even offer recycling programs for leftover supplies.

Conclusion

Effective organization and labeling are key to a smooth moving process. By following these steps, you can minimize chaos and enjoy a more structured unpacking experience. If you’re looking for reliable, professional movers in Toronto, consider One Day Movers, known for their efficiency and meticulous care.

At One Day Movers, we prioritize effective organization and labeling to ensure a seamless moving experience. Our meticulous steps are designed to minimize chaos and guarantee a structured unpacking experience for our clients. One Day Movers is not just about moving your belongings; we also provide invaluable assistance in organizing and labeling. This ensures that everything from delicate items to large pieces of furniture is placed correctly and opened at the right time.

Furthermore, we are proud to offer a special women’s packing team, known for handling your belongings with exceptional care and attention to detail. This dedicated team is trained to manage delicate items with the utmost precision, ensuring that your valuables receive the best treatment possible.

This high level of service sets One Day Movers apart, transforming what could be a stressful moving day into a seamless transition. Choose One Day Movers for a moving experience that prioritizes your needs and ensures everything goes smoothly from start to finish.

FAQs

1. What are the best materials for packing and labeling boxes?

For packing, sturdy boxes, strong packing tape, and bubble wrap are essential. For labeling, permanent markers and color-coded stickers or labels are recommended. These materials help ensure that your belongings are secure and that labels remain clear and visible throughout the move.

2. How should I label boxes for a move in Toronto?

Use clear, detailed labels for each box, specifying contents and room destination. Consider a color-coded system where each room is assigned a specific color. This method simplifies the process for both you and the movers, ensuring that boxes end up in the correct rooms quickly.

3. What items should I load last and unload first during a move?

Items that you will need immediately upon arrival at your new home, such as bedding, some kitchenware, and toiletries, should be loaded last on the truck and unloaded first. Label these boxes clearly as ‘Load Last, Unload First’ to make them easily identifiable.

4. How can I protect fragile items during a move?

Label boxes containing fragile items with clear markings such as “Fragile” and include directional arrows to indicate the correct upright position. Use ample cushioning materials inside each box to prevent items from shifting and possibly breaking.

5. Are there any innovative technologies to help with labeling boxes for moving?

Yes, using QR codes on each box is a modern approach. Each QR code can link to a detailed list of the box’s contents, accessible via smartphone. This method helps in tracking and locating items efficiently during and after the move.

6. What should I consider when packing specialty items like artwork or electronics?

Label these items with specific handling instructions and inform your movers about their importance. Use appropriate packing materials and consider custom solutions like crating for very delicate items. This ensures they are transported safely, especially over the varying conditions in a city like Toronto.

7. How do professional movers in Toronto handle the unpacking process?

Professional movers like One Day Movers can provide unpacking services that drastically reduce the stress of moving. They use systematic methods to ensure your belongings are not only transported safely but also placed and unpacked in an organized manner.

8. Where can I find reliable movers in Toronto?

For reliable moving services, look for well-reviewed companies such as One Day Movers, known for their professionalism and efficiency. Checking reviews on platforms like Google and Yelp can also help you find reputable movers in Toronto.

When planning a move, finding boxes can be both time-consuming and expensive. However, there are numerous free solutions available, as well as premium options if you need specific types of boxes.

Why Should We Buy Good Quality Sturdy Boxes for Packing?

When planning your move, the type of boxes you choose can significantly impact the ease and security of the process. Here’s why investing in good quality, sturdy boxes is essential:

  1. Protection of Belongings: High-quality boxes are designed to withstand the rigors of moving. They provide better protection against bumps, drops, and stacking pressure, ensuring your items remain safe and intact throughout the journey. Delicate items, electronics, and breakables particularly benefit from sturdy packaging, reducing the risk of damage.
  2. Durability for Long Distances: For long-distance moves, the durability of your boxes is paramount. Good quality boxes won’t buckle or tear easily under extended stress, which is essential when your belongings are in transit for longer periods.
  3. Stacking Stability: Strong, well-made boxes are easier to stack in the moving truck. This stability is crucial for maximizing space and ensuring that stacks of boxes don’t collapse, which can damage your possessions and create hazards for movers.
  4. Reusability: Investing in good quality boxes can pay off in the long run if you anticipate future moves. These boxes can be broken down and stored easily for reuse, offering not only a cost-effective solution over time but also an environmentally friendly one.
  5. Weather Resistance: High-quality moving boxes are often made with better materials that can withstand adverse weather conditions. This is crucial if your belongings are exposed to moisture or changes in temperature during the move.
  6. Peace of Mind: Knowing that your belongings are securely packed in sturdy boxes can provide significant peace of mind during what is often a stressful time. This assurance allows you to focus on other aspects of your move, confident that your possessions are well protected.

Free Solutions for Getting Moving Boxes

  • Family friends and neighbors: Start by asking family, friends, and neighbors if they have any boxes from recent deliveries or previous moves. Often, people have spare boxes that they are more than willing to give away.
  • Retail Stores: Many retail stores, including large chains and local shops, discard boxes regularly, especially after receiving shipments. Visiting places like liquor stores, bookstores, and grocery stores on a delivery day allows you to collect these boxes for free. Movers in Toronto often suggest checking with these stores as a reliable source for sturdy boxes.
  • Office Buildings: Office buildings frequently receive supplies and thus accumulate a lot of boxes, which they need to dispose of. A simple inquiry with the reception at these buildings can provide you with various sizes of boxes, perfect for different packing needs. These boxes are usually in good condition and can handle a variety of moving requirements.

Alternative Sources for Free Moving Boxes

If you’re searching for free moving boxes beyond the usual suspects like retail stores and friends, consider some alternative sources that can provide sturdy boxes for your move.

  • Social Media Platforms: Websites and apps like Facebook Marketplace, Craigslist, and Nextdoor are excellent places to find free moving boxes. Many people post their leftover boxes after a move, offering them for free to anyone willing to pick them up. This not only saves money but also helps reduce waste by reusing boxes.
  • Community Centers and Schools: Community centers, schools, and universities often have boxes from supply deliveries that they are happy to give away. Check with the facilities’ staff or even their social media pages for announcements about free boxes.
  • Recycling Centers: Some recycling centers allow residents to pick up used cardboard boxes for free. This can be a great option if you’re looking for eco-friendly solutions for your move. Additionally, it helps keep reusable materials in circulation.

How to Prepare Boxes for Moving

Once you’ve gathered your boxes, whether free or purchased, proper preparation is key to ensuring your belongings remain safe during the move.

  • Reinforce the Bottom of Boxes: Always use extra tape to reinforce the bottom of your boxes, especially if they’re carrying heavy items. Even free boxes that look sturdy might weaken under pressure, so an extra layer of tape ensures durability.
  • Line Boxes for Extra Cushioning: For delicate items, it’s important to line the bottom and sides of your boxes with cushioning material. You can use bubble wrap, crumpled newspaper, or even towels for this.
  • Seal Boxes Properly: Use strong packing tape to securely seal your boxes. Be sure to tape both the top and bottom seams, and consider making an additional “X” with the tape across the top for added reinforcement.

Best Options for Obtaining Moving Boxes

If you need sturdier or specialty boxes for your move, buying them might be the best approach. Here are some places where you can find high-quality moving boxes:

  • Moving Companies: Any moving company like One Day Movers offers more than just moving services; they also provide a variety of packing solutions. They have durable boxes designed to protect different types of items during transport, ensuring your belongings are safely moved. Whether you need boxes for delicate electronics or bulky furniture, they have options tailored to specific needs. It doesn’t matter if you opt for their packing services or not; One Day Movers can still deliver moving supplies right to your door.

  • Online Retailers: Check local moving supplies shops as they are excellent sources for both new and used boxes. These boxes are designed specifically for moving and storing items securely. For example, local storage also offers a wide range of box sizes and types, including specialty boxes for items like mirrors, books, or wardrobes. Shopping from these sites allows you to get exactly the kind of boxes you need delivered right to your door.
  • Box Manufacturers: For those with specific packing requirements, contacting a box manufacturer could be the ideal solution. These manufacturers can provide custom boxes tailored to your exact needs, from size specifications to the type of cardboard used. This option is perfect for those who are moving unusual items that require more protection or have non-standard dimensions.
  • Home Improvement Stores: Stores like Home Depot and Lowe’s also stock a variety of moving supplies, including heavy-duty boxes. These stores offer both individual boxes and full moving kits, which include a selection of box sizes along with packing materials like tape and cushioning.

Environmentally Friendly and Reusable Options

When considering moving supplies, it’s also worth exploring environmentally friendly and reusable options. These choices not only help reduce waste but can also offer a more durable means to protect your belongings during a move.

  • Rentable Moving Boxes: Some moving companies offer plastic moving boxes for rent. These boxes are sturdy, stackable, and can be reused many times, reducing environmental impact. Rental services typically deliver the boxes to your home and pick them up after you’ve moved and unpacked.
  • Green Packing Materials: Instead of traditional bubble wrap, consider using biodegradable packing peanuts or wrapping items in household linens. These materials are less harmful to the environment and can be composted or reused easily.
  • Cardboard Box Recycling Programs: Some moving companies participate in cardboard recycling programs, allowing you to return used boxes so they can be reused. This initiative not only cuts down on waste but also helps keep the costs of moving supplies down for everyone.

These options are excellent for those who are conscious of their environmental footprint and are looking for sustainable moving solutions. By choosing to rent reusable boxes or utilize recyclable materials, you can make your move greener.

One Day Movers Professional Packing & Moving Services in Toronto

Our special women’s packing team at One Day Movers brings an exceptional level of care and precision to the packing process. Before the move, we conduct an initial consultation to assess your specific needs and prepare a customized plan that addresses all your requirements. On the packing day, our team arrives fully equipped with all necessary supplies, so you don’t need to worry about purchasing anything. We expertly pack everything from kitchenware and clothes to electronics and special items like wine, art, sculptures, and frames.

Our Premium Packing Supplies Include:

  • Linen Boxes
  • Wardrobe Boxes
  • Dish/China Boxes
  • Lamp Boxes
  • Parts Boxes
  • TV Boxes
  • Picture Bins
  • Mattress Covers
  • Mirror/Picture Boxes
  • Wine Boxes
  • Packing Paper, Bubble Wrap, Labels, Fragile Stickers, and Plastic Wraps

Follow us on Instagram One Day Movers Instagram to see more of our work and packing tips!

Conclusion

Finding the right boxes for your move is crucial for a smooth transition to your new home. Whether you opt for free boxes from local stores and recycling centers or invest in premium boxes from specialized suppliers, there are plenty of options available to suit every need and budget. For those located in Toronto and looking for a reliable moving company, consider One Day Movers.

We are known for our efficiency and high-quality service, and as one of the best moving companies in Toronto, we offer a variety of packing solutions that can greatly facilitate your moving process. Reach out to us for both moving services and quality moving supplies tailored to your needs. 

Make your move stress-free with One Day Movers—your trusted partner in relocation.

FAQs

1. Where can I find free moving boxes?

You can find free moving boxes through various sources such as local retail stores, social media platforms like Facebook Marketplace and Nextdoor, recycling centers, schools, colleges, and office buildings. You can also ask family friends People often give away boxes right after they move.

2. What types of retail stores are good for finding free boxes?

Liquor stores, bookstores, and grocery stores are excellent places to start. These stores usually have a lot of boxes from shipments that they are willing to give away.

3. Are there any options for environmentally friendly moving boxes?

Yes, some companies offer rentable plastic moving boxes that are sturdy and reusable. Additionally, you can look for green packing materials like biodegradable packing peanuts or use household items like linens for packing.

4. Where can I purchase high-quality moving boxes?

Premium moving boxes can be purchased from moving companies and online retailers like local moving supplies shops and box manufacturers. Home improvement stores like Home Depot and Lowe’s also offer various moving supplies.

5. What should I consider when choosing between free and paid moving boxes?

Consider the durability and size of the boxes relative to what you need to pack. Paid boxes often provide more protection for delicate items, whereas free boxes are cost-effective for less fragile belongings.

6. How can I ensure the boxes I get for free are clean and in good condition?

Always inspect boxes for cleanliness and integrity. Check for signs of wear, tear, or contamination, especially if the boxes were previously used for food or industrial products.

7. Can moving boxes be recycled?

Yes, cardboard moving boxes can typically be recycled. Check with your local recycling center about dropping off used boxes, or see if your moving company participates in a recycling program.

8. What are some tips for using social media to find moving boxes?

Post a request in local community groups or on your profile. You can also set up alerts on platforms like Facebook Marketplace for new listings of free boxes.

Moving to a new place can be really exciting, but getting all your stuff ready needs some good planning. One big question people often ask is, “When should I start packing?” It’s important to find the right time because starting too early or too late can cause some problems. Let’s break it down and make a simple plan to help you pack up without any stress.

6-8 Weeks Before the Move: Get Organized

Before you start packing, it’s a good idea to organize your things. Go through each room, decide what you want to keep, and what you can give away or throw out. This is also a good time to make a list of your important or delicate items. Doing this early can make packing easier and save you time and money.

4-6 Weeks Before the Move: Begin with Less-Used Stuff

Start packing things you don’t use often, like clothes for a different season, books, and decorations. Think about rooms you don’t use every day, like a guest room. The goal is to start with things you won’t miss in your daily life.

3-4 Weeks Before the Move: Pack One Room at a Time

Now, focus on packing up one room at a time, like the dining room or home office. Put clear labels on each box, saying what’s inside and which room it’s for.

2 Weeks Before the Move: Pack the Stuff You Use a Bit Less

At this point, pack up most of your kitchen, leaving out only the things you really need for the next two weeks. Do the same for your living room, keeping only the important stuff.

1 Week Before the Move: Get Everything Ready

Pack up the rest of your kitchen, bedroom, and anything left from the other rooms. Make a special box with things you’ll need right away at your new place, like toothpaste, clothes, and important papers. This box should be the last one you pack and the first one you open.

1-2 Days Before the Move: Check Everything Again

Pack up any last-minute things and double-check every room to make sure you haven’t forgotten anything. If you’re taking your freezer, make sure to defrost it at least 24 hours before moving day.

Easy Tips for Your Packing Plan:

Plan according to Your Lifestyle:

  • If you’re busy, start packing a bit earlier to avoid last-minute stress.

Take Your Time:

  • It’s better to pack carefully and make sure your things are safe than to rush and risk breaking them.

Get Your Packing Stuff Early:

  • Before you start, get all the things you need for packing, like boxes, bubble wrap, tape, and markers. Having everything ready makes it easier.

Special Things Need Special Attention:

  • If you have special things like artwork or antiques, be extra careful with them when you’re packing.

Stay Organized:

  • While you pack, make a list of what you’re putting in each box. This helps you keep track of your things and can be important for insurance.

Ask for Help:

  • Don’t be shy about asking friends or family to help you pack. Make it fun with some food or a relaxed evening together. Just make sure everyone knows how to pack and label the boxes.

Get Your Essentials Ready:

  • Pack a bag with things you’ll need right away, like medicine, toiletries, and a few days’ worth of clothes.

Don’t Make Boxes Too Heavy:

  • Even if a box can fit a lot, don’t make it too heavy. You want to be able to lift it safely.

Label Clearly:

  • Besides saying what’s inside, write which room the box is for and if there’s anything fragile or needs special care.

Remember About Utilities:

  • Even though it’s not about packing, don’t forget to switch off or move your utilities and services according to your moving day.

Be Flexible

While this plan is a good starting point, every move is a bit different. Depending on your home size, the things you have, and what you like, you might need to change the plan a bit. The main thing is to stay flexible and not leave too much for the last minute.

And when you’re thinking about hiring professional packers and movers in Toronto, don’t hesitate to contact One Day Movers for a free quote. We’re not just good at moving your stuff, but we also know a lot about making moving easier for you.

Every move is special. Trust us to be there for you at every step, from clear pricing and great packing supplies to our Platinum Packing Experience.

Moving is a big deal, but with good planning, it can be exciting. Let One Day Movers make your move a breeze!

Decluttering your home is no easy task, especially when you’re surrounded by piles of belongings accumulated over the years. Whether you’re moving to a new place or simply want to refresh your space, these 13 tips will help you transform your home into a clutter-free haven.

Quick Tips for Decluttering

Tip Action Create a Plan List priority areas and tackle them from most to least cluttered. Set a Decluttering Mood Play energizing music to stay motivated. Tackle Each Room Focus on one area at a time for a systematic approach. Use Donation Bins Regularly Prevent future clutter by keeping bins for donations and undecided. Organize Digital Space Sort files, delete old emails, and organize folders. Celebrate Your Success Do a final clean-up and enjoy your refreshed space.

List of Tips to Declutter Your House 

1. Craft Your Decluttering Game Plan

Creating a plan is essential to stay organized and focused during the decluttering process.

  • List Priority Areas: Start with spaces that need the most attention, like closets or storage rooms.
  • Work in Order: Begin with the messiest rooms and move toward the tidier ones.
  • Include Small Spaces: Don’t forget about drawers, cabinets, and other hidden areas where clutter may accumulate.

2. Set the Mood with Music

Decluttering doesn’t have to feel like a chore—set a lively tone by playing your favorite tunes.

  • Create a Playlist: Choose music that energizes you and helps you stay motivated.
  • Use Headphones: Pop in headphones for an immersive experience that lets you focus solely on the task.

3. Dive into the Bathroom Adventure

Bathrooms often accumulate expired products and forgotten items.

  • Sort and Toss: Check labels and discard expired products, unused makeup, and anything that’s out of date.
  • Add a Touch of Spa Ambiance: Light a scented candle or add a plant post-declutter to create a fresh, relaxing atmosphere.

4. Master Your Bedroom Sanctuary

A clutter-free bedroom can be your ultimate relaxation zone.

  • Nightstand Refresh: Clear out nightstand drawers, leaving only essential items.
  • Dust and Vacuum: Deep clean surfaces, floors, and under furniture for a clean and comfortable environment.

5. Fashion-Forward Closet Magic

Closets are often a hotspot for unnecessary items.

  • Sort Clothes into Categories: Create piles for washing, donating, discarding, and keeping.
  • Curate Your Wardrobe: Aim to keep versatile and frequently worn pieces to simplify your wardrobe.

6. Tackle the Office Paper Storm

Office spaces tend to overflow with paperwork and supplies.

  • Sort and Organize: Use two bins—one for keeping and one for discarding. Label files and folders for easy access.
  • Shred Sensitive Documents: Safely dispose of any documents with personal information to protect your privacy.

7. Entryway Vibes

The entryway sets the first impression of your home, so keep it neat and welcoming.

  • Keep Essentials Only: Designate a small area for keys, a daily jacket, and a bag. Remove anything that clutters the space.
  • Add a Decorative Touch: Consider a simple plant or decorative bowl for keys to keep it functional yet stylish.

8. Kitchen Coolness

The kitchen can be one of the most challenging rooms to declutter due to its many gadgets and supplies.

  • Sort Appliances and Utensils: Keep only frequently used items accessible, and store or donate duplicates.
  • Organize Pantry Items: Invest in clear containers and labels for a clean, easy-to-navigate pantry.

9. Living Room Bliss

The living room should be a relaxing area free from unnecessary clutter.

  • Assign “Homes” for Everything: Designate spots for remotes, blankets, and other items.
  • Manage Cables and Chargers: Use cable organizers to keep cords tidy and prevent tripping hazards.

10. Garden Tranquility

Your outdoor space deserves just as much attention as your indoor areas.

  • Clear Out Debris: Remove any dead plants, old furniture, or unused tools.
  • Create a Relaxing Space: Add a few cushions, a small table, or a chair to create an inviting garden area.

11. Storage Habits Reimagined

A consistent storage routine can help prevent future clutter buildup.

  • Use Donation Bins: Keep two bins on hand—one for donations and one for items you’re unsure about.
  • Set a Routine: Regularly go through these bins and make decisions to prevent them from piling up.

12. Digital Space Zen

Don’t forget about your digital clutter!

  • Organize Files and Folders: Sort documents and photos into labeled folders on your computer.
  • Declutter Email and Apps: Delete unneeded files, emails, and apps to streamline your digital space.

13. Celebrate Your Victory!

Once you’ve completed decluttering, it’s time to celebrate!

  • Final Clean-Up: Mop or vacuum to give your home a fresh, polished finish.
  • Enjoy Your Space: Take a moment to relax and enjoy the fruits of your labor, admiring your clutter-free environment.

Seasonal Decluttering: Refresh Your Home Year-Round

Decluttering isn’t a one-time activity; refreshing your space each season can keep things manageable and organized.

  • Spring: Deep-clean, remove winter items, and swap in lighter clothing.
  • Summer: Declutter outdoor gear, sunscreen, and seasonal décor.
  • Fall: Clear out summer items, refresh linens, and prep for the colder months.
  • Winter: Organize holiday décor, donate extra winter clothes, and create cozy, clutter-free indoor spaces.

Regular seasonal decluttering keeps your home from becoming overwhelmed with off-season items and helps you easily transition between seasons.

Sustainable Decluttering: Eco-Friendly Practices

Decluttering can often produce waste, but there are ways to stay environmentally friendly.

  • Recycle: Separate recyclables such as paper, cardboard, glass, and electronics.
  • Donate: Local shelters and donation centers often accept clothing, furniture, and kitchen items in good condition.
  • Upcycle: Repurpose items, such as using old jars for storage or turning fabric into cleaning rags.
  • Limit Future Clutter: Adopt a “one-in, one-out” rule to maintain a balanced home.

Sustainable decluttering keeps waste to a minimum, ensuring your process is both environmentally friendly and efficient.

Minimalism in Decluttering: Create a Capsule Home

Using minimalism as a guide can simplify your decluttering journey, especially if you aim to live with only essentials.

  • Limit Possessions: Only keep what you truly need or love.
  • Capsule Wardrobe: Reduce clothing items to essential, versatile pieces.
  • Declutter Monthly: Conduct small monthly decluttering sessions to maintain minimalism.
  • Intentional Shopping: Adopt mindful purchasing habits to prevent unnecessary accumulation.

A minimalist approach helps maintain a clutter-free home, encouraging a purposeful and balanced lifestyle.

Conclusion

Decluttering is more than just tidying up; it’s a powerful step toward creating a peaceful and organized living space. By following these practical steps, you can make the process manageable and even enjoyable. Remember, decluttering doesn’t have to happen overnight—start with small areas, celebrate your progress, and gradually tackle more challenging spaces.

Incorporate seasonal, sustainable, and minimalist practices as part of your lifestyle to keep your home clutter-free all year round. Decluttering also offers a mental refresh, creating a calm and organized environment where you can feel truly at ease. Embrace the process, stay consistent, and let your newly organized space inspire a sense of freedom and tranquility in your life.

Here’s to transforming your home into a haven of simplicity and joy!

FAQs

Q. How often should I declutter my home?

Decluttering frequency depends on your lifestyle and space. Many people find seasonal decluttering, every 3-4 months, effective. For daily maintenance, set aside 10-15 minutes each evening to tidy up small areas and keep clutter from building up.

Q. What should I do with items I no longer need?

Consider donating items in good condition to local charities, shelters, or community centers. For electronics, check for recycling programs, and for sentimental items, decide if they can be digitized or repurposed. This way, you can clear space while helping others or reducing waste.

Q. How do I manage sentimental clutter?

Start small by choosing a few sentimental items that truly hold value, and display or store them meaningfully. For the rest, take photos and create a digital archive, allowing you to let go without losing the memories.

Q. What’s the best way to organize my digital space?

Organize your files into well-labeled folders, delete duplicates, and use cloud storage to keep important files secure. Set a regular schedule to declutter digital devices, as a clutter-free digital space reduces distractions and improves productivity.

Q. How can I maintain a clutter-free home long-term?

Adopt daily habits like putting items back in their designated spaces, having a “one-in, one-out” policy for new items, and setting aside time each month for a quick declutter. Embrace a minimalist mindset to avoid acquiring unnecessary items in the first place.

Q. What if I get overwhelmed with too much clutter?

Start with one small area and work gradually to avoid burnout. Focus on high-traffic zones first, such as entryways or the kitchen, to experience the benefits of decluttering quickly. You can also seek help from friends, family, or professional organizers for additional support.

Q. How can I make decluttering fun or enjoyable?

Play your favorite music, reward yourself after each session, or work alongside a friend. Break large tasks into smaller, manageable chunks, and celebrate your progress. Many people find that setting goals and visualizing the final result keeps motivation high.