Moving gym equipment can be a challenging task due to its size, weight, and complexity. Whether you’re relocating a few pieces to a new home or moving an entire home gym, it’s essential to do it safely and efficiently. This guide provides detailed tips on how to move gym equipment without causing damage to the equipment or injury to yourself.

1. Plan Ahead

Inventory Your Equipment

Start by taking an inventory of all the gym equipment you need to move. This includes weights, machines, mats, and smaller accessories. Knowing what you have helps you plan the move more efficiently and ensures nothing gets left behind.

Measure Doorways and Pathways

Measure the doorways, hallways, and any tight spaces the equipment will need to pass through. Compare these measurements with the dimensions of your equipment to ensure everything will fit. If necessary, disassemble larger pieces to make them easier to move.

Gather Packing Supplies

Get all the necessary packing supplies such as moving blankets, bubble wrap, packing tape, and sturdy boxes. These materials will help protect your equipment during the move.

2. Disassemble When Possible

Remove Attachments

For larger machines like treadmills, ellipticals, and weight benches, remove any attachments and accessories. This might include handles, foot pedals, or weight plates. Keep screws and small parts in labeled plastic bags to avoid losing them.

Fold and Lock

If your equipment can be folded, like a folding treadmill, ensure it is locked in the folded position. This prevents it from unfolding during the move.

Take Photos

Before disassembling complex machines, take photos of the equipment from multiple angles. These photos will serve as a reference when reassembling the equipment at your new location.

3. Use Proper Lifting Techniques

When moving heavy gym equipment, it’s crucial to use proper lifting techniques to avoid injury:

Lift with Your Legs

Keep your back straight and bend your knees, lifting from your legs rather than your back to prevent strain.

Get Help

Don’t tackle heavy items alone. Enlist friends or hire professional movers like One Day Movers in Toronto, who specialize in safely moving heavy items.

Plan Your Route

Ensure the path is clear of obstacles to avoid trips and falls.

Use Equipment 

Employ dollies or lifting straps to facilitate easier and safer transport of heavy gym equipment.

4. Protect Your Equipment

Wrap in Moving Blankets

Wrap each piece of equipment in moving blankets to protect it from scratches and dents. Secure the blankets with packing tape or plastic wrap.

Use Bubble Wrap for Smaller Items

For smaller items like dumbbells, kettlebells, and resistance bands, use bubble wrap to prevent them from shifting and getting damaged. Place these items in sturdy boxes and fill any empty spaces with packing paper or foam.

Secure Loose Parts

Secure any loose parts, such as power cords and cables, with zip ties or tape. This prevents them from getting tangled or damaged during the move.

5. Transporting Equipment

Use a Suitable Vehicle

Ensure you have a suitable vehicle for transporting your gym equipment. A truck or van with ample space and tie-down points is ideal. Make sure the equipment is securely fastened to prevent it from moving during transit.

Load Heaviest Items First

Load the heaviest items first and place them towards the front of the vehicle. This helps distribute the weight evenly and keeps the vehicle stable during the move.

Drive Carefully

Drive slowly and carefully, especially when going over bumps or around corners. Sudden movements can cause the equipment to shift and potentially get damaged.

6. Reassembling at the New Location

Refer to Photos and Manuals

Use the photos you took during disassembly as a reference when reassembling your equipment. If you have the manuals, follow the instructions carefully to ensure everything is put together correctly.

Check for Damage

Inspect each piece of equipment for any damage that may have occurred during the move. Address any issues before using the equipment to prevent further damage or injury.

Test Equipment

Before starting your workout routine, test each piece of equipment to ensure it is functioning correctly. Make any necessary adjustments to ensure it is safe to use.

Unique Tips for Moving Specific Gym Equipment

Treadmills

  • Disassemble if Possible: Remove the console and fold the treadmill if it has a folding mechanism. Use a furniture dolly to move the base.
  • Secure the Belt: Use packing tape to secure the treadmill belt in place to prevent it from moving during transit.

Ellipticals

  • Remove Pedals and Arms: Disassemble the elliptical by removing the pedals and arms. This makes it easier to maneuver through doorways and hallways.
  • Protect the Flywheel: Wrap the flywheel in bubble wrap to protect it from damage.

Weight Benches

  • Remove Attachments: Take off any attachments such as leg curl pads or preacher curls. Wrap the bench in a moving blanket and secure it with tape.
  • Disassemble Frame: If the weight bench can be disassembled, take apart the frame for easier transport.

Free Weights

  • Use Sturdy Boxes: Place free weights like dumbbells and kettlebells in sturdy boxes. Ensure the boxes are not too heavy to lift and fill any gaps with packing paper to prevent movement.
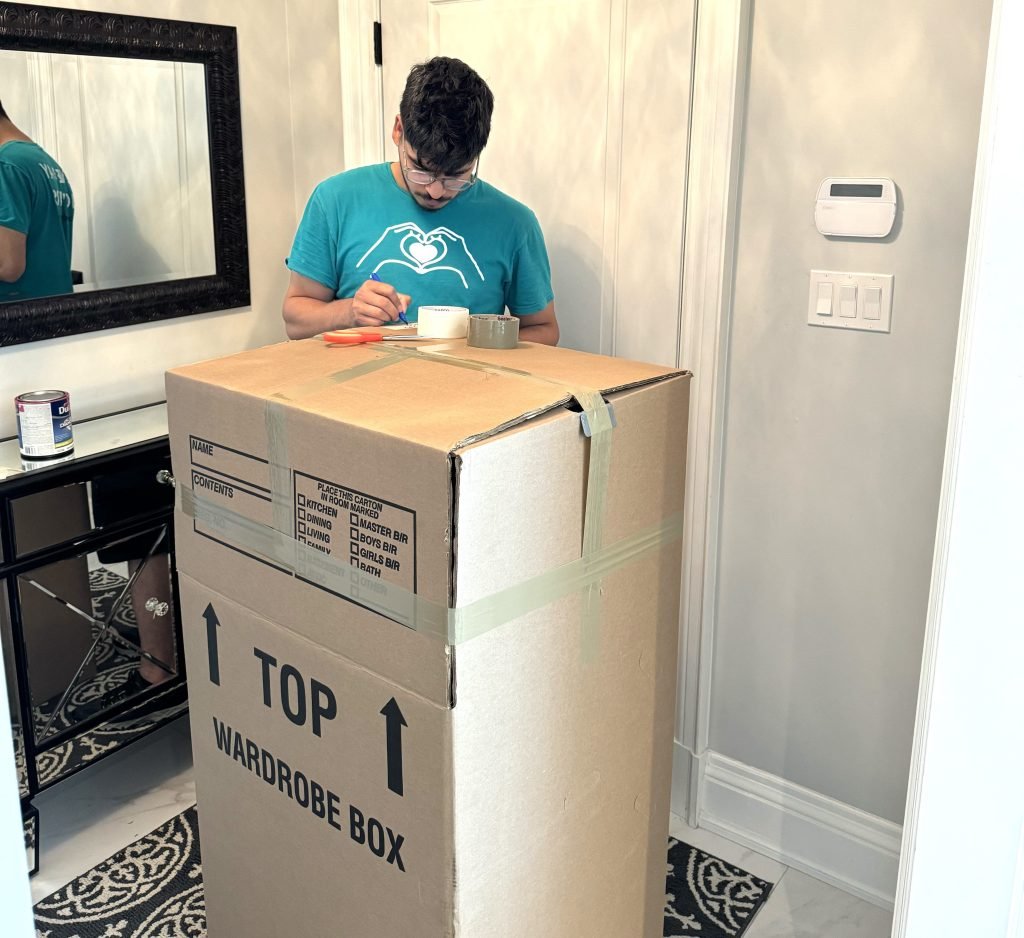
  • Label the Boxes: Clearly label the boxes with their contents and weight to make unloading and organizing easier.

Resistance Machines

  • Disassemble Cables and Pulleys: Take apart cables and pulleys to prevent them from getting tangled. Keep small parts in labeled bags.
  • Protect Moving Parts: Wrap moving parts in bubble wrap and secure them with tape to prevent damage.

Hiring Professional Movers

When considering hiring professional movers for your gym equipment, it’s essential to choose a company with the right expertise:

  • Research Moving Companies: Start by researching moving companies that specialize in handling gym equipment. Look for reviews and testimonials to find a reputable moving company in Toronto. Companies like One Day Movers are known for their proficiency in handling such specialized moves.
  • Get Multiple Quotes: It’s wise to obtain quotes from several movers in Toronto to compare prices and services. Ensure that the company you select offers insurance to cover any potential damages during the move.
  • Ask About Equipment Handling: Inquire specifically about how the company manages the transportation of gym equipment. Check that they have the necessary tools and experience. One Day Movers, for example, is equipped with the appropriate gear and expertise to ensure that your gym equipment is moved safely and efficiently.

Final Thoughts

Moving gym equipment requires careful planning, the right techniques, and appropriate tools. By following these guidelines and choosing experienced movers like One Day Movers, you can be confident that your equipment will be handled safely and efficiently. Preparing and protecting your gym equipment properly can smooth the moving process and help you resume your fitness routine quickly. 

If the task seems too daunting, investing in a professional service like One Day Movers in Toronto, which has significant experience in moving gym equipment, can ensure that everything arrives in perfect condition, allowing for a hassle-free relocation.


FAQ: Moving Gym Equipment

Q1: What should I do first when planning to move gym equipment? 

A1: Start by taking an inventory of all the gym equipment you need to move. Measure doorways, hallways, and any tight spaces to ensure the equipment will fit through. Gather necessary packing supplies like moving blankets, bubble wrap, and sturdy boxes.

Q2: How can I make large gym equipment easier to move? 

A2: Disassemble larger machines when possible. Remove attachments such as handles and foot pedals, and fold and lock equipment like treadmills. Take photos before disassembly to help with reassembly at your new location.

Q3: What are the best practices for lifting heavy gym equipment? 

A3: Use proper lifting techniques by lifting with your legs, keeping your back straight, and bending your knees. Always get help for heavy items, clear your path of obstacles, and use equipment like dollies or lifting straps to make the process safer.

Q4: How can I protect my gym equipment during the move? 

A4: Wrap each piece of equipment in moving blankets and secure them with packing tape or plastic wrap. Use bubble wrap for smaller items and place them in sturdy boxes. Secure loose parts, such as power cords and cables, with zip ties or tape.

Q5: What type of vehicle is suitable for transporting gym equipment? 

A5: Use a truck or van with ample space and tie-down points. Load the heaviest items first towards the front of the vehicle to evenly distribute weight and maintain stability during transit.

Q6: How should I reassemble gym equipment at the new location? 

A6: Refer to the photos you took during disassembly and follow the manuals’ instructions carefully. Inspect each piece for any damage and test the equipment to ensure it functions correctly before use.

Q7: Are there any specific tips for moving treadmills? 

A7: If possible, disassemble the treadmill by removing the console and folding it. Use a furniture dolly to move the base and secure the treadmill belt with packing tape to prevent it from moving during transit.

Q8: What should I do with free weights during a move? 

A8: Place free weights like dumbbells and kettlebells in sturdy boxes, ensuring they are not too heavy to lift. Fill any gaps with packing paper to prevent movement and clearly label the boxes with their contents and weight.

Q9: Should I hire professional movers for my gym equipment? 

A9: Hiring professional movers can be a good investment, especially if the task seems too daunting. Look for companies with expertise in handling gym equipment, like One Day Movers in Toronto. Obtain multiple quotes and ensure the movers offer insurance and have the necessary tools and experience.

Q10: How can I ensure a smooth move for my gym equipment? 

A10: Plan ahead, disassemble equipment when possible, use proper lifting techniques, protect your equipment, and consider hiring professional movers. Following these guidelines will help ensure your gym equipment is moved safely and efficiently, allowing you to resume your fitness routine quickly.

Moving a couch can be challenging due to its size, weight, and shape. However, with proper planning and the right techniques, you can move your couch safely and efficiently. This guide provides step-by-step instructions and some unique tips for moving a couch without any hassle.

1. Measure Your Couch and Doorways

Measure the Couch

Start by measuring your couch. Measure the length, width, height, and diagonal. Knowing these dimensions will help you determine the best way to maneuver it through doorways and hallways.

Measure Doorways and Hallways

Next, measure the doorways, hallways, and any other tight spaces the couch will pass through. Compare these measurements with the dimensions of your couch to ensure it will fit. If it’s a tight squeeze, you might need to remove doors or find an alternative route.

2. Prepare the Couch

Remove Cushions and Legs

Remove any loose cushions and detachable parts like legs or feet. This reduces the weight and makes the couch easier to handle. Store the removed parts in a labeled bag or box.

Protect the Couch

https://drive.google.com/file/d/1Ov-9ehblGlVAEGiSWep3Y-4wCvXOWGj2/view?usp=drive_linkWrap the couch in moving blankets or bubble wrap to protect it from scratches and dents. Secure the wrapping with packing tape or plastic wrap. For added protection, cover the couch with a plastic sofa cover.

3. Get the Right Equipment

Moving Straps

Use moving straps to help distribute the weight of the couch evenly. Moving straps make it easier to lift and carry heavy items without straining your back.

Furniture Dolly

A furniture dolly can be a lifesaver when moving a heavy couch. Place the couch on the dolly and secure it with straps. This allows you to roll the couch to the moving truck or its new location.

Sliders

Furniture sliders are useful for moving the couch across floors without damaging them. Place sliders under each corner of the couch to glide it smoothly over carpet or hardwood floors.

4. Enlist Help

Recruit Helpers: Moving a couch is typically not a one-person job. Get at least one or two helpers to assist with the move, ensuring everyone understands their role.

Hire Professional Movers: If the task seems too daunting, especially if you need to navigate stairs or have an exceptionally large couch, consider hiring professional movers. One Day Movers in Toronto can provide expert services to ensure your couch is moved safely and efficiently.

5. Plan the Route

Clear the Path

Clear any obstacles along the route you will take to move the couch. This includes furniture, rugs, and decorations. A clear path reduces the risk of tripping and makes the move smoother.

Communicate with Helpers

Discuss the plan with your helpers. Decide who will lift which part of the couch and how you will maneuver it through tight spaces. Clear communication is crucial to avoid accidents.

6. Lift and Move the Couch Safely

Proper Lifting Techniques

Use proper lifting techniques to avoid injury. Bend at your knees, not your back, and lift with your legs. Keep the couch close to your body and avoid twisting while lifting.

Tilt and Pivot

Tilt the couch slightly to fit through doorways and around corners. Pivot the couch carefully with the help of your assistants. Take your time to avoid damaging the couch or walls.

Use Moving Straps

Attach moving straps to the couch and have your helpers assist in lifting. Moving straps can help you distribute the weight more evenly, making the couch easier to carry.

7. Navigating Stairs

Use a Dolly

If you need to move the couch up or down stairs, use a furniture dolly. Secure the couch on the dolly and carefully maneuver it step by step. Ensure you have helpers to guide and support the dolly.

One Step at a Time

Take one step at a time and communicate with your helpers. Ensure everyone is aware of the plan and lifts in sync. This prevents accidents and ensures the couch is moved safely.

Protective Gear

Wear protective gear like gloves and sturdy shoes to prevent injuries. Gloves provide a better grip, and sturdy shoes offer support and protection.

8. Loading and Transporting

Loading onto the Truck

Use a ramp to load the couch onto the moving truck. Keep the couch upright to save space and secure it with straps to prevent it from shifting during transit.

Securing in the Truck

Place the couch against a wall of the truck and use moving straps or bungee cords to secure it. Ensure it is stable and won’t move during the drive.

9. Unloading and Setting Up

Reverse the Process

When you arrive at your new location, reverse the moving process. Use the same techniques to unload and move the couch into your new home.

Reassemble the Couch

Reattach any removed parts, such as legs or feet. Place the cushions back on the couch. Ensure it is set up in the desired location.

Check for Damage

Inspect the couch for any damage that may have occurred during the move. If you notice any issues, document them and contact your moving company or insurance provider.

Unique Tips for Moving a Couch

1. Use a Sheet or Blanket for Sliding

If you don’t have furniture sliders, use a sheet or blanket to slide the couch across the floor. This protects your floors and makes it easier to move the couch.

2. Remove Doors if Necessary

If the couch doesn’t fit through the door, consider removing the door from its hinges. This provides extra space and makes maneuvering the couch easier.

3. Disassemble if Possible

Some couches can be disassembled further. Check if the back or arms can be removed to make the couch easier to move.

4. Protect Walls and Corners

Use corner guards or padding to protect walls and corners from damage. This is especially important if you are moving the couch through tight spaces.

FAQs

1. What should I do if my couch doesn’t fit through the door?

If your couch doesn’t fit through the door, try tilting it or removing the door from its hinges. You can also disassemble parts of the couch if possible.

2. Can I move a couch by myself?

It is not recommended to move a couch by yourself due to its size and weight. Recruit at least one or two helpers to assist with the move.

3. Should I hire professional movers for moving a couch?

Hiring professional movers is a good idea, especially for large or heavy couches. They offer specialized services for moving large furniture items safely and efficiently.

4. How can I protect my floors while moving a couch?

Use furniture sliders, a sheet, or a blanket to slide the couch across the floor. This protects your floors from scratches and damage.

5. What equipment do I need to move a couch?

You will need moving straps, a furniture dolly, sliders, and protective gear. These tools help you move the couch safely and efficiently.

Final Thoughts

By following these steps and utilizing the right techniques and equipment, you can ensure that moving your couch is a manageable, damage-free process. For those in Toronto looking for extra help, One Day Movers offers professional moving services to handle large furniture pieces like couches with ease, ensuring your move is as stress-free as possible.

Moving a refrigerator is not an easy task. It’s large, heavy, and can be easily damaged if not handled correctly. However, with the right preparation and steps, you can move your refrigerator safely and efficiently. Here are ten essential steps to help you relocate your refrigerator without any hassle.

1. Prepare Your Refrigerator for the Move

Empty the Fridge

Start by emptying your refrigerator. Remove all food, beverages, and any removable shelves or drawers. This reduces the weight and prevents items from shifting during the move. Plan meals ahead to minimize waste.

Defrost the Fridge

Unplug the refrigerator at least 24 hours before moving to allow it to defrost. This prevents water leakage during the move. Place towels around the fridge to absorb any water. Use a hairdryer to speed up the process if needed.

Clean and Dry

Clean the inside of the refrigerator thoroughly. Ensure it is completely dry to prevent mold and odors. Use a mixture of baking soda and water for a thorough clean. Leave the doors open overnight to air it out.

2. Secure the Doors and Components

Tape the Doors Shut

Use strong tape to secure the doors shut. This prevents them from swinging open during the move, which can cause damage or injury.

Protect Removable Parts

Wrap removable shelves and drawers in bubble wrap or towels. Pack them separately in a box to prevent damage. Label the box for easy reassembly.

3. Gather the Necessary Moving Supplies

Moving Dolly

Use a moving dolly specifically designed for heavy appliances. This helps you move the refrigerator without straining your back.

Straps and Blankets

Use moving straps to secure the refrigerator on the dolly. Wrap the fridge in moving blankets to protect it from scratches and dents.

Measuring Tape

Measure doorways, hallways, and the new space to ensure the refrigerator fits through and in its new location.

4. Get Help for the Move

Recruit Helpers

Moving a refrigerator is not a one-person job. Recruit at least one or two helpers to assist with the move. Ensure everyone understands the plan and their role.

Hire Professional Movers

Consider hiring professional movers, especially if you have a large refrigerator. One Day Movers, one of the leading moving companies in Toronto, offers specialized services for moving heavy appliances safely.

5. Move the Refrigerator Carefully

Tilt and Secure

Tilt the refrigerator slightly and slide the dolly underneath. Secure the fridge with moving straps to keep it steady on the dolly. Do not lay the refrigerator flat.

Navigate with Caution

Carefully navigate through doorways and hallways. Move slowly to avoid damaging walls or the refrigerator. Communicate with your helpers to coordinate movements.

6. Loading and Transporting

Loading onto the Truck

Use a ramp to load the refrigerator onto the moving truck. Keep the fridge upright at all times to prevent oil from the compressor from flowing into the cooling lines.

Secure the Refrigerator

Secure the refrigerator inside the truck with straps to prevent it from moving during transit. Place it against a wall and cushion it with blankets or pillows.

7. Unloading and Setting Up

Unload with Care

Reverse the loading process to unload the refrigerator. Use the dolly and ramp to move it off the truck safely.

Positioning in the New Space

Move the fridge to its new location and remove the moving straps and blankets. Allow the fridge to sit for a few hours before plugging it in. This lets the oil settle back into the compressor.

8. Reconnecting and Testing

Plug In and Power Up

Plug the refrigerator into the outlet and turn it on. Check the temperature settings and ensure it starts cooling properly.

Reinstall Shelves and Food

Reinstall the shelves and drawers. Place your food back in the refrigerator once it reaches the desired temperature.

9. Protect Your Floors and Walls

Use Furniture Sliders

If you need to move the refrigerator across a room, use furniture sliders under the feet. This makes it easier to slide the fridge without lifting it and protects your floors from scratches.

Cover Corners and Edges

Wrap the corners and edges of the refrigerator in foam or padding. This protects both the refrigerator and your walls from scratches and dents.

10. Plan the Move in Advance

Create a Moving Plan

Sketch out a plan of your move, noting the exact path you will take. Measure all doorways and hallways to ensure the refrigerator fits. Have a backup plan in case the first route is not feasible.

Schedule Your Move

If you’re hiring professional movers, schedule your move in advance. One Day Movers, one of the best Toronto movers, can provide you with the necessary services and support. Booking early ensures availability and can save you money.

Unique Tips for Moving a Refrigerator

1. Use Ice Packs

Place ice packs inside the refrigerator during the move to keep it cool. This can help preserve any residual coldness and prevent odors.

2. Check for Leaks

Before moving, check the refrigerator for any leaks or issues. Address these before the move to prevent problems at your new location.

3. Disconnect Water Lines

If your refrigerator has a water dispenser or ice maker, disconnect the water lines properly. Cap the ends to prevent leaks and spills during the move.

4. Service the Fridge

Consider servicing your refrigerator before the move. This ensures it is in good working condition and can prevent potential issues.

Final Thoughts

Moving a refrigerator requires careful planning and execution. By following these ten essential steps, you can ensure a safe and smooth relocation of your appliance. If you need help, consider hiring One Day Movers, one of the leading moving companies in Toronto. They provide reliable and professional moving services, ensuring your move is stress-free. Contact One Day Movers today for a free quote and experience top-notch moving service from one of the best Toronto movers.

FAQs

1. How long should I unplug the refrigerator before moving?

Unplug the refrigerator at least 24 hours before moving to allow it to defrost completely. This prevents water leakage during the move.

2. Can I lay the refrigerator on its side during the move?

It is best to keep the refrigerator upright. Laying it on its side can cause oil to flow into the cooling lines, potentially damaging the unit.

3. How do I protect the floors when moving the refrigerator?

Use furniture sliders or place cardboard or old towels on the floor to protect it from scratches and dents.

4. Should I hire professional movers for moving a refrigerator?

Hiring professional movers is a good idea, especially if you have a large or heavy refrigerator. One Day Movers, one of the best Toronto movers, offers specialized services for moving appliances safely.

5. How long should I wait before plugging in the refrigerator after moving?

Wait a few hours before plugging in the refrigerator after moving. This allows the oil to settle back into the compressor.

Moving presents a perfect opportunity to declutter and donate items you no longer need. Clothes often make up a significant portion of these donations. Donating clothes before you move not only helps you reduce the number of items you have to pack and transport but also supports those in need. This guide will explore where to donate clothes in Toronto, with some unique tips and suggestions.

Why Donate Clothes Before You Move?

Donating clothes has multiple benefits. It helps others, reduces waste, and makes your move easier. By donating, you also support local charities and organizations. Plus, you can often get a tax deduction for your donations.

Traditional Donation Options

1. Goodwill

Goodwill is a well-known organization that accepts clothing donations. They have several locations in Toronto where you can drop off your items. Goodwill sells the donated items in their stores and uses the proceeds to support job training and employment services.

2. The Salvation Army

The Salvation Army is another popular option. They accept clothing donations and distribute them to those in need or sell them in their thrift stores. The funds raised support various programs, including shelters and rehabilitation centers.

3. Value Village

Value Village is a for-profit thrift store chain that partners with local charities. They accept clothing donations and give a portion of their profits to their charity partners. Donating to Value Village is convenient because they have many locations in and around Toronto.

In 2010, the total amount of financial donations that individuals made to charitable or non-profit organizations stood at $10.6 billion. Besides financial contributions, many people also donated clothing, toys, or household items to these organizations. In fact, almost all Canadians aged 15 and over (94%) gave goods or food, or made a financial donation. 

This widespread culture of giving highlights the importance of donating your gently used clothes as a way to contribute to the community and support various charitable causes.

Unconventional Donation Options

1. New Circles

New Circles is a Toronto-based charity that provides clothing to those in need. They focus on helping newcomers, refugees, and low-income families. They accept gently used clothing and distribute it through their GLOW (Gently Loved Outfits to Wear) program. Donating to New Circles ensures your clothes go directly to those who need them most.

2. Dress for Success Toronto

Dress for Success Toronto helps women achieve economic independence by providing professional attire. They accept donations of business-appropriate clothing, shoes, and accessories. Your donation can help a woman succeed in her career by giving her the confidence she needs for job interviews and work.

3. Sistering

Sistering is an organization that supports at-risk, socially isolated women. They accept donations of clothing, especially warm clothing for winter months. Donating to Sistering helps vulnerable women stay warm and comfortable.

4. Diabetes Canada

Diabetes Canada runs a clothesline program that accepts clothing donations. They use the proceeds from selling donated items to fund diabetes research and support services. They offer convenient home pick-up services, making it easy to donate.

Unique Tips for Donating Clothes

1. Donate Seasonally Appropriate Items

Consider the season when donating. Winter coats are more needed in the colder months, while summer clothes are useful in warmer weather. This ensures your donations are used immediately.

2. Organize a Clothing Swap

Before donating, organize a clothing swap with friends or neighbors. This can be a fun way to exchange items and ensure your clothes find a new home. Any leftover items can then be donated.

3. Host a Donation Drive

If you have a lot of clothes to donate, consider hosting a donation drive. Encourage your community to donate their clothes, and arrange a bulk donation to a local charity. This amplifies the impact of your donation.

4. Check for Specific Needs

Contact local charities to ask if they have specific needs. Some organizations may need children’s clothing, work attire, or warm winter clothes. Tailoring your donation to their needs makes it more valuable.

Preparing Your Clothes for Donation

1. Clean and Fold Clothes

Make sure all clothes are clean and folded. This helps the receiving organization sort and distribute them more efficiently.

2. Check for Damages

Only donate clothes in good condition. Check for stains, tears, or missing buttons. Most organizations prefer items that can be worn immediately.

3. Pack Smartly

Use sturdy bags or boxes to pack your donations. Label them if necessary, especially if you are donating different types of items (e.g., men’s, women’s, children’s clothing).

Final Thoughts

Donating clothes before you move benefits both you and your community. It lightens your load and supports those in need. Whether you choose a well-known organization or a local charity, your donation makes a difference.

One Day Movers, one of the leading moving companies in Toronto, can help you with all your moving needs. From packing to transportation, they ensure a smooth and stress-free move. Contact One Day Movers today for a free quote and experience top-notch service from one of the best Toronto movers.


FAQs

1. Where can I donate clothes in Toronto?

You can donate clothes to several organizations in Toronto. Some of the most popular ones include Goodwill, The Salvation Army, and Value Village. These organizations accept a wide range of clothing and use the proceeds from sales to support various community programs. Additionally, local charities like New Circles focus on helping newcomers and low-income families. Dress for Success Toronto accepts business attire to help women achieve economic independence. Sistering supports at-risk women and is particularly in need of warm clothing for the winter months. Each of these organizations has specific needs and missions, so consider what type of clothing you have and where it can make the most impact.

2. Do any organizations offer pick-up services?

Yes, some organizations offer pick-up services for clothing donations. For instance, Diabetes Canada runs a clothesline program that provides convenient home pick-up services. This is especially useful if you have a large quantity of items to donate or if you lack transportation. Scheduling a pick-up is usually straightforward and can be done online or by phone. These services ensure that your donations are collected efficiently and that you don’t have to worry about transporting them yourself.

3. What types of clothes are needed the most?

The types of clothes needed can vary by organization. Generally, business attire, winter clothes, and children’s clothing are in high demand. Business attire is crucial for organizations like Dress for Success Toronto, which helps women enter or re-enter the workforce. Winter clothes are always needed in Toronto’s cold climate, especially by charities like Sistering that support vulnerable populations. Children’s clothing is also important for organizations that help families in need. Contacting local charities to ask about their current needs can ensure your donations are most useful.

4. Can I get a tax deduction for donating clothes?

Yes, many organizations provide a receipt for your donation, which you can use for tax deductions. When you donate clothes, ask the organization for a donation receipt. Keep this receipt for your tax records. The amount of the deduction is typically based on the fair market value of the items donated. Tax deductions can be a great incentive to donate, as they provide a financial benefit while helping those in need.

5. How should I prepare clothes for donation?

Preparing your clothes for donation is important to ensure they are accepted and used. Ensure all clothes are clean and in good condition. Wash them before packing to remove any dirt or odors. Check for damages like stains, tears, or missing buttons. Most organizations prefer items that can be worn immediately. Pack your clothes in sturdy bags or boxes to protect them during transport. Label the packages if you are donating different types of clothing (e.g., men’s, women’s, children’s). Proper preparation helps charities process and distribute your donations more efficiently.

6. Are there specific times of the year when donations are needed most?

Yes, donations are often needed most during certain times of the year. Winter clothing is in high demand as the weather gets colder. Additionally, many organizations experience an increase in need around the holiday season, when they support families with extra services and supplies. Spring and summer are good times to donate lighter clothing as people prepare for warmer weather. Consider the seasonal needs of local charities when planning your donations.

7. Can I donate other items along with clothes?

Many organizations accept other items along with clothes. Goodwill, The Salvation Army, and Value Village often accept household items, furniture, and toys. Check with the organization to see what types of items they accept. Donating a variety of items can further support the charity’s mission and help more people in need. Always ensure that non-clothing items are in good condition and working order.

8. How can I find the nearest donation center?

Finding the nearest donation center is easy with online resources. Most large organizations, like Goodwill and The Salvation Army, have website locators where you can enter your zip code to find the nearest location. You can also check Google Maps or other online directories for local charities and donation centers. If you prefer pick-up services, many organizations provide this information on their websites as well.

9. Can I organize a clothing drive for a local charity?

Yes, organizing a clothing drive is a great way to support a local charity. Contact the charity to see if they are interested and what their specific needs are. They can provide you with guidelines and promotional materials. Gather a group of friends, family, or coworkers to contribute. Set a collection date and promote the drive through social media, flyers, and word of mouth. A clothing drive can significantly increase the amount of donations and raise awareness about the charity’s mission.

10. What should I avoid donating?

Avoid donating clothes that are stained, torn, or heavily worn. Charities prefer items in good condition that can be used immediately. Also, avoid donating items that are out of season unless the charity specifically requests them. Check with the organization if you have any questions about what is acceptable. Donating only high-quality items ensures that your contributions are useful and appreciated.

Moving inside Toronto can be expensive and stressful. Understanding moving costs helps you budget better and choose the right moving services. Here’s a detailed guide on the average moving costs in Toronto and nearby cities and some unique tips to save money.

Average Moving Costs in Toronto

1 Bedroom or studio apartment

Moving to a one-bedroom house in Toronto is relatively affordable compared to larger homes.

  • Local Move: The cost ranges from $300 to $800 with 2 movers This price includes basic services such as loading, transporting, and unloading your belongings.

2 Bedroom 

A two-bedroom house move involves more items and requires more labor.

  • Local Move: Expect to pay between $750 to $1,450 with 3 movers The variability in price depends on the volume of items and the complexity of the move.

3 Bedroom 

Moving to a three-bedroom house is more complex and requires more resources.

  • Local Move: Costs range from $1750 to $2,550 with 4 movers. This price includes the labor required to handle the increased volume of items.

4 Bedroom 

A four-bedroom house move is significantly more expensive due to the volume of items.

  • Local Move: Costs range from $2050 to $2,750 with 5 movers. This price reflects the additional labor and time required.

5+ Bedroom House

Moving a five-bedroom or larger house involves the most complexity and highest costs.

  • Local Move: Prices range from $3,040 to $5,200. The significant increase is due to the volume of items and the need for multiple movers.

Additional Costs

Besides the basic moving costs, there are additional expenses to consider:

  • Packing Supplies: Boxes, packing tape, bubble wrap, and other materials can add up. Ensure you budget for these items, as they are essential for protecting your belongings.
  • Moving Insurance: Protecting your belongings during the move is crucial. Basic insurance is often included, but consider purchasing additional coverage for valuable items.
  • Storage Costs: If you need to store your belongings for any period, factor in storage costs. Storage fees can add up, especially if you need long-term storage.
  • Hourly Rate: Local moves are usually charged by the hour, with rates ranging from $150 to $250 per hour. The rate depends on the number of movers and the complexity of the move.

Factors Influencing Toronto Moving Costs

Distance

Long-distance moves cost more than local moves. The farther you move, the higher the transportation costs. Long-distance moves require more planning, additional fuel, and possibly overnight stays for the moving crew.

Size and Weight of Items

Larger or heavier items require more labor and equipment from the moving company, which further increases costs. Be prepared for higher costs if you have many large items. Heavy items like pianos or safes may require special handling, adding to the overall cost.

Services Required

Additional services like packing, unpacking, or storage from the moving company’s side significantly increase costs. Be clear about what services you need to avoid unexpected charges. Some moving companies offer full-service options that handle every aspect of the move, from packing to unpacking, but these services come at a premium.

Season

The peak moving season (summer) results in higher prices. Off-peak seasons (fall and winter) might be cheaper. Plan your move during the off-peak season to save money. Moving companies are in high demand during the summer, leading to increased prices and limited availability.

Tips for Calculating Moving Costs in Toronto 

Toronto movers can use the below tips for calculating their costs: 

Estimate Square Footage

Measure distances between doorways and hallways to estimate the size of your move. Knowing the size helps movers give accurate quotes. Provide this information to your moving company to receive a more precise estimate.

Get Quotes

Compare estimates from qualified contractors to find the best deal. Request detailed quotes to understand what’s included and avoid hidden fees. Some moving companies offer in-home estimates, which can provide a more accurate quote based on the actual volume of items to be moved.

Ask About Additional Fees

Be aware of extra charges for packing materials, long carries, stair or elevator use, or shuttle services. Ask for a list of potential extra fees to budget accurately. Understanding these potential costs can help you avoid surprises on a moving day.


Other Factors to Consider While Calculating Moving Costs

Accessibility of Your Home

If movers have to carry items a long way from your home to the truck, costs increase. Stairs, elevators, and narrow hallways add to the difficulty and time required. 

Always check if the Toronto movers charge extra for these conditions. For example, if you live in a high-rise building with a small elevator, the moving process may take longer and cost more.

Permits and Parking

In Toronto, securing parking for the moving truck can be challenging. Sometimes, you need a permit to park the moving truck in front of your home. Permits cost extra, and fines for improper parking can add to your moving expenses. Ensure you check local regulations and obtain any necessary permits ahead of time.

Time of the Month

End-of-month moves are more expensive. Many people move at this time due to lease agreements ending. If possible, schedule your move mid-month to save money. Moving companies often have more availability and lower rates during the middle of the month.

Weather Conditions

Weather can affect moving costs. Moving during winter can be cheaper, but snow and ice can cause delays and increase the risk of damage. Toronto Movers might charge more if conditions are particularly bad. Consider the weather forecast and choose a moving date with favorable conditions to avoid additional costs.

How can I reduce  Moving Costs in Toronto?

Toronto Movers should consider the following tips for keeping their moving costs under check: 

Declutter Before Moving

The less you move, the cheaper it will be. Sell or donate items you don’t need. This reduces the volume of items and can lower your moving costs. Holding a garage sale or selling items online can also provide extra cash to offset moving expenses.

DIY Packing

Pack your belongings yourself to save money. However, be careful with fragile items. Use proper packing materials to avoid damage. Packing yourself can significantly reduce labor costs, but ensure you have the time and resources to do it properly.

Hire a Moving Company Early

Booking movers in Toronto early can save you money. Last-minute bookings often cost more due to limited availability. Secure your moving date as soon as possible to lock in lower rates and ensure the Toronto movers you want are available.

Use Free Moving Supplies

Get free boxes from local stores. Reuse old newspapers for packing material. This reduces the cost of moving supplies. Many stores are happy to give away boxes, especially if you ask for them ahead of time.

Moving with Pets

Moving with pets can be challenging. Here are some tips:

  1. Prepare a Pet Travel Kit: Include food, water, toys, and a first-aid kit. Having these essentials on hand can make the journey less stressful for your pet.
  2. Keep Pets Calm: Use a pet carrier. Familiar items help keep them calm. Consider using calming sprays or medications if your pet is particularly anxious.
  3. Update Pet Information: Change the address on your pet’s ID tags and microchip. Ensure your pet’s information is current in case they get lost during the move.

Moving with Children

Moving with children requires extra planning. Here are some tips:

  1. Involve Children in the Move: Let them pack their toys and belongings. Involving children can make them feel more comfortable with the move.
  2. Keep Essentials Handy: Pack a bag with essentials for the first few days. Include items like clothes, toiletries, and favorite toys to help children adjust quickly.
  3. Maintain Routines: Try to keep meals and bedtimes consistent. Maintaining routines helps children feel secure during the transition.

Hiring a Reliable Toronto Moving Company

What to Look For

  1. Experience: Choose a company with good reviews and a long history. Experienced movers are more likely to handle your belongings with care and efficiency.
  2. Insurance: Ensure they have insurance to cover any damages. Moving insurance provides peace of mind and protects you financially if something goes wrong.
  3. Transparent Pricing: Avoid companies with hidden fees. Clear and upfront pricing helps you budget accurately and avoid unexpected charges.

The cost of living in Toronto

The cost of living in Toronto is relatively high compared to other Canadian cities. Housing is the biggest expense, with the average monthly rent for a one-bedroom apartment in the city center around $2,300. Utilities, including electricity, heating, cooling, water, and garbage, can add about $150 to $200 per month. Groceries and dining out also contribute significantly, with an average monthly food budget ranging from $300 to $600 per person. Transportation costs, including public transit passes, are around $156 per month. Overall, a comfortable lifestyle in Toronto requires a well-planned budget to manage these various expenses.

Why Choose One Day Movers

One Day Movers is one of the best Toronto movers. They offer competitive pricing, excellent service, and years of experience. They are fully insured and provide transparent pricing. One Day Movers specializes in making the moving process smooth and stress-free, handling everything from packing to transportation with the utmost care.

Final Thoughts

Moving costs in Toronto and nearby cities can vary. Understanding these costs helps you budget better. By considering unconventional factors and following unique tips, you can save money. Proper planning and budgeting are key to a successful move.

If you’re planning a move, contact One Day Movers. They are one of the top moving companies in Toronto. Their team will handle your move efficiently and safely. One Day Movers takes pride in offering reliable and affordable moving services, ensuring that your transition to a new home is as smooth as possible.

FAQs

1. What are the average moving costs for different-sized homes in Toronto?

Moving costs in Toronto vary based on the size of your home and the number of movers needed. For a one-bedroom or studio apartment, expect to pay between $300 to $800 with 2 movers. A two-bedroom house move costs between $750 to $1,450 with 3 movers. Moving a three-bedroom house ranges from $1,750 to $2,550 with 4 movers. For a four-bedroom house, the cost is between $2,050 to $2,750 with 5 movers. Lastly, moving a five-bedroom or larger house can cost between $3,040 to $5,200, reflecting the increased complexity and volume of items.

2. What are the average moving costs for a one-bedroom house in Toronto?

For a local move, the cost ranges from $300 to $800. For a long-distance move, expect to pay between $2,500 to $10,000 or more. These costs include basic services like loading, transporting, and unloading your belongings.

3. How much does it cost to move a three-bedroom house locally in Toronto?

Moving a three-bedroom house locally costs between $890 to $2,570. The price depends on the volume of items and the complexity of the move. Long-distance moves for the same size house range from $2,500 to $10,000 or more.

4. What additional costs should I consider when moving?

Additional costs include packing supplies, moving insurance, storage fees, and hourly rates for local moves. Packing supplies can add up, and moving insurance is crucial for protecting your belongings. Storage fees apply if you need to store items temporarily, and hourly rates for movers range from $50 to $250.

5. How can I reduce my moving costs?

You can reduce moving costs by decluttering before the move, packing your belongings yourself, booking movers early, and using free moving supplies. Selling or donating items you don’t need can lower the volume of items to be moved, and packing yourself can significantly reduce labor costs.

6. What factors influence the cost of a move?

Several factors influence moving costs, including the distance of the move, the size and weight of your items, the services required, and the season. Long-distance moves are more expensive than local moves, larger or heavier items increase costs, and additional services like packing or storage add to the overall price. Moving during peak season (summer) also results in higher costs.

7. Why are end-of-month moves more expensive?

End-of-month moves are more expensive because many people move at this time due to lease agreements ending. Moving companies are in high demand during this period, leading to increased prices. If possible, schedule your move mid-month to save money.

8. What should I look for in a reliable moving company?

When hiring a moving company, look for experience, insurance coverage, and transparent pricing. Choose a company with good reviews and a long history, ensure they have insurance to cover any damages, and avoid companies with hidden fees.

9. How can I prepare for moving with pets?

Prepare a pet travel kit with food, water, toys, and a first-aid kit. Use a pet carrier to keep your pet calm, and consider using calming sprays or medications if needed. Update your pet’s ID tags and microchip with your new address.

10. How can I make moving easier for my children?

Involve your children in the move by letting them pack their toys and belongings. Pack a bag with essentials for the first few days, and try to keep meal and bedtime routines consistent to help them adjust quickly.

11. Why should I choose One Day Movers for my move in Toronto?

One Day Movers is one of the best Toronto movers. They offer competitive pricing, excellent service, and years of experience. They are fully insured and provide transparent pricing, making your move smooth and stress-free. Contact One Day Movers for a reliable and affordable moving experience.

Moving to a new home is an exciting but often stressful experience. With all the packing, logistics, and goodbyes involved in moving, it’s simple to miss crucial details that can hugely impact your moving day. At One Day Movers in Toronto, we’ve seen it all, and we’re here to help you navigate the process seamlessly. 

Here are 10 critical mistakes to avoid for a successful move:

Avoid last-minute Packing:

Packing your belongings is a time-consuming task that should never be left until the last minute. Start early and tackle a little each day to avoid a frantic rush as moving day approaches. This not only saves time and money but also ensures that your items are packed safely and efficiently. If you’re not good at packing, consider hiring professional packing services and packers to handle it for you.

Last-Minute Mover Booking:

Don’t wait until the eleventh hour to book your moving company. Secure your spot as soon as you have a moving date to avoid the risk of being left without movers or having to settle for less-than-ideal options. For end-of-month moves, most of the moving companies get fully booked months ahead, so it’s wise to plan and schedule early.

Pack and move all valuables items by yourself:

Personal mementos, jewelry, and important documents should never be packed into the moving truck. Transport these items yourself to minimize the risk of loss or theft during the move.

Must Review Moving Contract:

Before hiring a moving company, carefully review the moving contract to ensure you understand all terms and conditions. This step can save you from surprises and headaches down the line. Do not hesitate to ask if you have any questions.

DIY Moving Without Proper Planning:

While a DIY move may seem cost-effective, it requires meticulous planning and can be physically challenging. Hiring professional movers may cost you more but it is always worth it and offers peace of mind and efficiency.  

Misrepresenting the Size of the Move:

Be honest about the size and scope of your move when booking movers. This ensures that the appropriate resources are allocated, preventing delays and complications on moving days. Most moving companies that charge by the hour depend on customers being honest about how much stuff they have. This helps them recommend the right truck size and number of movers needed. It’s crucial to avoid situations where the movers arrive with a smaller truck or inadequate equipment. Being honest ensures a smooth move without stress. Get Moving Quote Now 

Donate or throw the unnecessary items:

Use the moving process as an opportunity to declutter and donate items you no longer need. This not only streamlines your move but also benefits others in need. There is no meaning you are paying moving charges for those items that you are not going to use.

Showing respect for movers is crucial:

Treat your movers with kindness and respect. Clear communication, appreciation for their hard work, and a clean working environment can go a long way in ensuring a smooth moving experience. On a moving day, get to know the names of your movers and allow them space to do their job. 

Leaving a Messy House:

Prepare your home for the move by decluttering and cleaning as much as possible. A tidy environment not only facilitates the moving process but also ensures a positive experience for everyone involved. Before your moving date, do your best to pack, donate, and clean as much as you can.

Forgetting to Change Your Address:

Don’t overlook the importance of updating your address with relevant parties. Failing to do so can result in missed mail and delayed deliveries, causing unnecessary stress during an already busy time.

By avoiding these common pitfalls, you can alleviate much of the stress associated with moving and set yourself up for a successful transition to your new home. At One Day Movers, we’re dedicated to making your move as smooth and seamless as possible. Contact us today to book your move and experience the difference firsthand.


Moving can be hard, but it can also be fun! Whether you’re moving nearby or far away, it’s important to plan and find ways to save money. We know moving is tough, so we want to help you make it easy and affordable. If you’re ready to move and need a good moving company, One Day Movers is here to help you move to a new place without stress.

Here are some easy ways to save money when moving:

Sort your stuff before moving:

  • Look at your things and decide what you need.
  • Give away or sell things you don’t need.
  • The less stuff you move, the less money you spend on moving.

Start planning early:

  • Plan your move as soon as you can.
  • Check different moving companies and find one that fits your budget.
  • Planning early helps you avoid surprises and extra costs.

Use free packing stuff:

  • Instead of buying new boxes, ask friends or family if they have any.
  • Check with stores for free boxes.
  • Use your blankets and clothes to protect fragile items.
  • Use newspapers to fill gaps in boxes.

Choose a good moving company:

  • Pick a professional moving company like One Day Movers.
  • Check reviews and ask friends for advice.
  • A good company helps keep your things safe during the move.

Move during the off-season:

  • Moving in the summer can be more expensive.
  • Move in the fall or winter when prices are lower.
  • Weekdays are usually cheaper than weekends.

Pack and unpack by yourself:

  • Doing it yourself saves money.
  • You know where everything is when you unpack.
  • Use the free packing materials to save even more.

Label your boxes clearly:

  • Write on boxes so movers know where to put them.
  • This saves time and money.
  • Use colored stickers or write the room’s name on the box.
  • Unpacking is much easier when everything is labeled.

By following these tips, you can make your moving day smoother and more cost-effective. With the help of One Day Movers and these strategies, as well as Tips for your stress-free moving day, you’ll be settling into your new home in no time.

Preparing for a move can be exhilarating, but when it comes to packing up the garage, the task often seems like navigating through a maze of workout equipment, tools, and accumulated odds and ends. Fear not! With a well-thought-out approach and a touch of organization, packing your garage can be efficient and stress-free.

Here’s a personalized step-by-step guide to make the garage packing and moving process smoother:

Begin with Decluttering:

  • Kick off the process by decluttering. Take a close look at every item in your garage and decide if it deserves a spot in your new home. Consider letting go of old paints, damaged tools, or items untouched for years.

Categorization is Key:

  • Group similar items together to streamline the packing and unpacking process. Categories could include gardening tools, automotive equipment, sports gear, and more.
  • Pro Tip: Think ahead about seasonal items, ensuring you have quick access to what you’ll need based on your destination’s climate or the time of year.

Revisit Original Boxes:

  • If you’ve held onto the original boxes and packaging for power tools or equipment, now is the time to put them to use. These boxes are specifically designed to protect delicate items during a move.
  • Pro Tip: Invest in sturdy packing materials to safeguard both heavy-duty equipment and fragile items.

Handle Hazardous Materials with Care:

  • For items like fertilizers, pesticides, or paint, ensure they’re sealed tightly to prevent leaks. Clearly label these boxes as ‘Hazardous’ to guarantee careful handling.
  • Pro Tip: Prioritize safety and dispose of hazardous materials correctly to adhere to moving company regulations.

Disassemble for Efficiency:

  • Disassemble large and bulky items, such as workbenches or shelves, to save space and prevent potential damage during transit. Keep small components organized in labeled bags.
  • Pro Tip: Capture clear photos before disassembling complex equipment for easy reassembly later.

Opt for Clear Container Organization:

  • Store small parts like screws, nails, and bolts in clear, sealable containers or jars. This ensures they remain visible and easily identifiable.

Provide Padding for Protection:

  • Safeguard sharp gardening tools or equipment by wrapping them in old rags or bubble wrap. This not only prevents injuries during the move but also protects neighboring items from scratches.

Shield Fragile Items:

  • For delicate items like glass ornaments, wrap them carefully in newspaper or bubble wrap. Clearly label the box as ‘Fragile’ for added caution.

Prioritize Weight Distribution:

  • When loading boxes, always ensure that the heaviest items are placed at the bottom. This contributes to stability during transit and minimizes the risk of damage to lighter items.

The Power of Labels:

  • Each box should be meticulously labeled with its contents and the designated room (‘Garage’). This labeling system proves invaluable during the unpacking phase.
  • Pro Tip: Keep a box labeled ‘Essentials’ for easy access to tools or equipment needed immediately upon arrival.

Approach the garage-packing task with a calm demeanor and a methodical strategy, and you’ll find that even the most cluttered garage can be efficiently and safely packed.

Ready to explore the assistance of professional movers in Toronto? Reach out to One Day Movers for a personalized quote. With years of expertise, transparent pricing, top-quality packing materials, and the luxurious Platinum Packing Experience, they are dedicated to ensuring your move is a seamless transition.

Embark on your moving journey where your needs are anticipated—One Day Movers is here to make your life transition truly effortless!

Moving day is finally here, and we’ve got your back with 13 simple tips to make it a breeze. We’ve learned a lot from helping lots of people move, and we want to share our wisdom with you.

13 Tips for Stress-Free Moving Day:

Time is Your Friend

Moving day goes by quickly, so plan for more time than you think you need. Get up early, have a coffee, and take care of things like saying goodbye to your kids and making sure your pets are safe.

Pack Smart for Day One

Keep important stuff like toothbrushes, chargers, and medicine in one handy place. Use suitcases or marked boxes so you can find them easily.

Give Your Place a Quick Clean

Before the moving team arrives, do a final check of each room. Clean up any spills or messes. You’ll need cleaning supplies at your new place, so pack them last.

Check Your To-Do List

Leave your new address for mail and let utilities know about your move. If you’re tipping the movers, make sure you have some cash on hand.

Stay in the Loop

Keep your phone close, so you don’t miss any calls from the movers. Check the street for any changes or issues.


Talk to the Movers

Meet the people helping you move. Share any important info about your place. Be around to help if any problems come up.

Relax and Let Them Work

Once things get started, let the movers do their thing. If you have questions or ideas, feel free to speak up. We’re here to make you smile and help you through this big change.

Know When You’re Leaving

As the truck gets loaded, tell anyone waiting for you at your new place when you’ll arrive. Make sure you have your mover’s phone number in case of delays.

Lock Up Your Old Place

Check that windows and doors are closed and locked. Do one last check to make sure everything’s clean. Leave your keys as planned.

Meet the Truck at Your New Home

Help the movers get into your new place. Figure out where you want your things. If you’re renting, take pictures to show the condition of each room.

Check the Basics

Make sure the water, electricity, and wifi work in your new home. Look around to make sure it’s safe for kids or pets.

Say Thanks and Finish Up

After the movers unload, check everything is in place. If you’re using pros, someone from their team will talk to you and make sure you’re happy. Sign off on the paperwork and tip the team if they did a good job.

Set Up Your New Space

Start by cleaning a bit, but don’t stress about unpacking everything right away. Focus on setting up your bedrooms and getting your kitchen and bathroom ready. Take it easy during the first few days.

Moving can be a big deal, but with these 13 tips, we’re here to help make it easy and even a bit fun. Here’s to a successful move and a happy start in your new home!

If you’re in Toronto and planning a move, consider reaching out to the best packers and movers in Toronto for a hassle-free experience. Whether you need movers and packers or are looking for affordable movers, they’ve got you covered. Need a quick move? Explore the option of One Day Movers for added convenience.

Have you ever wondered if moving companies can take apart your furniture? It’s a common question when you’re getting ready for a big move. Let’s break it down in simple terms.

Yes, They Can! But There’s More to It…

Moving can be a bit overwhelming with all the packing, logistics, and the actual moving day. And then there’s the challenge of dealing with large furniture. That’s where professional movers come in handy. They not only move your stuff but can also take apart your furniture.

Moving Companies Do More Than You Think

Moving companies, like One Day Movers, do a lot more than just moving your things from one place to another. They help you pack, unpack, load, and unload. But one cool thing they do is take apart furniture when needed.

What Do Movers Offer? Let’s Keep It Simple

Movers help you pack your stuff safely, from clothes to fragile items. They load your boxes onto trucks using special equipment, making sure your big furniture doesn’t get damaged. And yes, they can take apart furniture and put it back together for you.

Why Should You Consider Professionals for Furniture Disassembly? Let’s Break It Down

Moving can be a bit stressful, right? Especially when it comes to big furniture. But hiring professionals like One Day Movers can make it easier for you. Let’s see why.

  • Save Time, Stress Less
    • Moving day is busy, and pros can handle the big furniture, saving you time and stress.
  • Keep Your Stuff Safe
    • Your furniture isn’t just stuff; it’s special to you. Professionals know how to take it apart without breaking anything.
  • Stay Safe During the Move
    • Moving heavy things without knowing how can be risky. Pros have safety measures to avoid accidents.
  • Easy Reassembly at Your New Place
    • The same experts who took apart your furniture will put it back together correctly at your new home.

What to Think About Before Hiring Movers? Let’s Make It Simple

Thinking about hiring movers to take apart your furniture? Here are a few things to consider.

  • Check Their Experience
    • Make sure the movers know how to handle big furniture. One Day Movers, for example, has experienced folks who know their stuff.
  • Listen to Other People
    • See what others say about the movers. If they’re good at their job, people will talk about it.
  • Ask About the Costs
    • Moving companies charge for their services. Check if taking apart furniture is included in the price or if it costs extra.
  • Safety First! Are You Covered?
    • Make sure the movers have safety measures and insurance in case something goes wrong.

How to Take Apart Furniture – Easy Steps

Taking apart furniture might sound hard, but it’s not if you know what you’re doing. Let’s keep it simple.

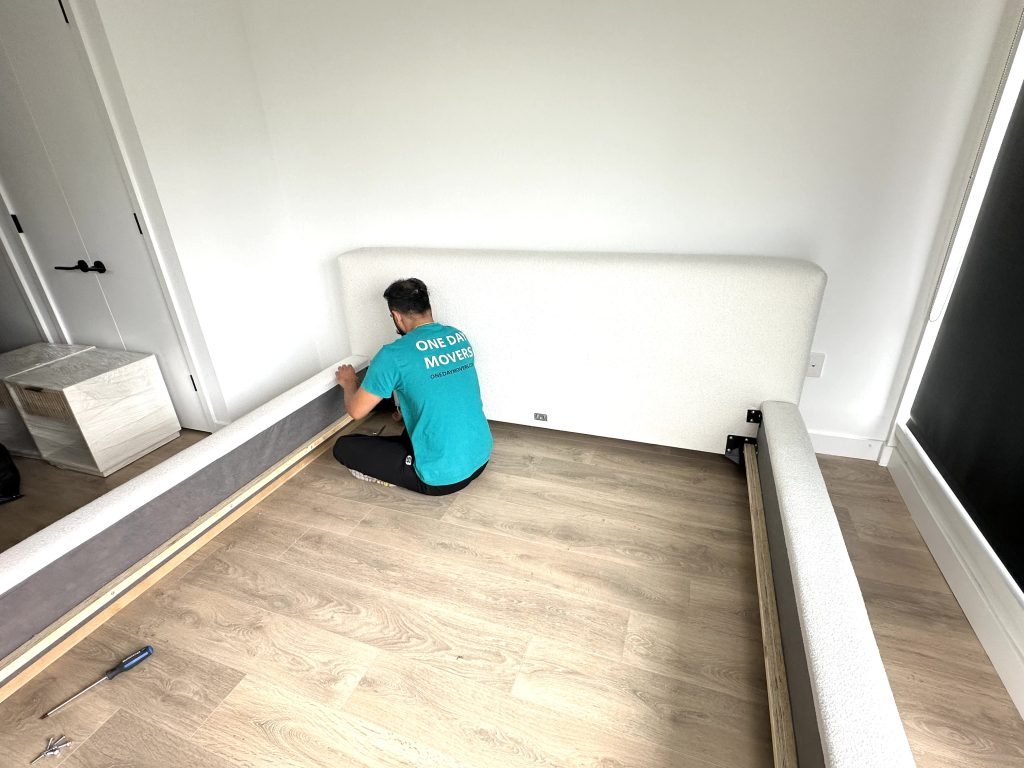
  • Start with Drawers and Shelves
    • Remove things like drawers and shelves first. It makes the big parts lighter and safer to move.
  • Get Rid of Bolts and Screws
    • Next, use tools like screwdrivers to take out bolts and screws. Pros have the right tools for this.
  • For Antiques, Be Extra Careful
    • If you have old furniture, be extra careful. Some things are better not taken apart to keep them safe.
  • Putting It Back Together After the Move
    • If you hire pros, they’ll put everything back together at your new place. Just ask what they can help with.

Tips for Taking Apart Furniture – Keep It Safe and Simple

Taking apart furniture might seem tricky, but with these tips, it’ll be a breeze.

  • Use the Right Tools
    • Get the tools you need – screwdrivers and wrenches are a good start.
  • Stay Organized
    • Label things as you take them apart. It makes putting them back together much easier.
  • Be Gentle with Antiques
    • Old furniture needs extra care. If you’re not sure, get help from professionals.
  • Ask Pros for Complex Stuff
    • If something looks too hard, ask professionals for help. They know how to deal with tricky things.

Remember: Safety First! Easy Does It

Moving is a big task, but with the right help, it can be easy. Keep safety in mind, use the right tools, and take your time. Whether it’s a big move or just taking apart furniture, it’s better to be safe than sorry.


FAQs About Movers Taking Apart Furniture – Simple Answers

Curious about movers taking apart furniture? Here are some easy answers.

Q: Will Movers Take Apart Furniture?

A: Yes, movers like One Day Movers can take apart and put back together your furniture. It makes moving smoother and reduces the chance of damage.

Q: Do I Need to Take Apart My Bed Frame?

A: Nope! Professionals can safely take apart and move your bed frame without you having to do anything.

Q: What Furniture Should I Take Apart?

A: Big, bulky, or fragile furniture, like beds and bookshelves, might need to be taken apart for a safer move.

Q: Can All Furniture Be Taken Apart?

A: Most furniture can be taken apart by removing screws or bolts. Let the professionals handle it if you’re not sure.

In Conclusion – Easy Moving with One Day Movers!

Moving companies, like One Day Movers, make things easy. They know how to handle your furniture, take it apart if needed, and put it back together. If you’re planning a move, check out One Day Movers for a stress-free experience! Visit our website at onedaymovers.com today and get started on an easy move!